Preface
Did you always want to learn how to make your own Website. With this guide we will show you how to make a great looking and modern website in no time. For this we will be using the free tool WordPress. The best thing first, no coding skills or any other extra skills are required to master this guide. You will learn everything you need directly here!
From start to finish this guide will show you all the necessary steps that are needed to get a website up and running in less than an hour. Additionally, we have some extra tips & tricks that a lot of other guides on the web do not cover.
So let’s just dive right into it. Here is an outline of the main topics we will cover in this guide:
(You want to jump start with a certain topic? Just click on it!)
As an extra, we will talk about the following tips & tricks to give you that extra touch to your newly made website.
- How to get a logo (Jump to this topic)
- Where to get the best free stock images and mockups (Jump to this topic)
- How to choose the right colors for your website (Jump to this topic)
- How to choose the right fonts for your website (Jump to this topic)
- Getting found on search engines (Jump to this topic)
- Web Analytics (Jump to this topic)
- SEO Quickstart (Jump to this topic)
Step #0: The Basics – What to consider when creating a website
Before we dive right into the whole process of making a website, let us first of all take a look at the things you should consider before you start. You should keep the following things in mind when you plan to create website.
Thoughts before you start
Choose a goal
Always choose a goal for your website: You should never just make a website for the sake of having a website. Consequently this means your website should have a purpose. For example you might want to attract new customers, sell goods online or showcase your awesome photography skills. Knowing the goal of your website will ultimately affect several things. This includes the look of your website, the tools you need building it and of course the content you would have to create for your website.
Think about your audience
Create what your audience wants: You want to attract a lot of visitors to your website. Therefore you will need to create a website your audience wants to see and the content your audience is expecting. In order to do so think about your audience. For example think about their demographics:
- What’s their age?
- What’s their gender?
A website targeted for kids will definitely look different and will use a different speech than a website targeted to elderly people. So a websites targeting women will more likely use purple colors than websites targeting men. Hence create a website that meets the characteristics of your audience. This will make it more attractive to them.

Keep it simple
The easier the better: Visitors that come to your website will probably not read the content of your website from start to finish. As a result they will probably just scan for the content they are searching for (and most importantly they do not want to waste too much time searching). So keep that in mind: Keep it simple and distill everything down to the essentials. Thus giving your visitors the chance to find what they are searching for fast, easy and distraction free. This is especially important when it comes to content that is display on small mobile devices.
Hint: See how this directly relates to the need of having a goal for your website? Having defined a goal will instantly tell you what is necessary on your website and what’s not.
Now that we have covered what you should keep in mind when building a website, you might ask yourself the following. Why you should I make a website at all.
Reasons why you should make a website
There are several reasons why you would want to make a website and do it on your own. Here are some of our thoughts…
Earn and save Money
- You can make a lot of money from a website: Let’s for example consider a blog website. Blogging about products you love or a hobby you are very engaged in can give you the possibility to earn money e.g. by using Affiliate-Links in your posts.
- You learn a valuable extra skill that can earn you a lot of money: You could provide your new skills as a service. So what this means is, that you could offer to create websites for others. What might make this sound even more attractive to you is the following: You can easily charge a four figures range for a good website.
- You can save a lot of money: Hiring a professional programmer to make a website for you can cost you a lot of money. However if you just spend a little time with this guide, all the necessary skills to set up a site on your own will be yours – forever!
Promote yourself or your business
- It helps you to get seen on the web: No matter what purpose. In case you make a website to show your hobby or want to create website to grow your business: a website will help you grow your audience. Therefore it will connect you with like minded people, show your skills or what you love and share it with the world.
- It makes your business look much more professional: Think about the last time you tried to get some extra information about a company’s product or service. It’s very likely that you wanted to look up this information on their homepage. When they don’t have one something just does not feel right.
This guide will give you all the required skills to basically set up any kind of website you can think of for example:
| Affiliate Website | Digital Download Website | Jobboard Website | Photgraphy Website |
| App Website | DIY Website | Landingpage Website | Podcasting Website |
| Barber Website | eCommerce Website | Lawyer Website | Portfolio Website |
| Blog Website | Gardening Website | Locksmith Website | Product Review Website |
| Church Website | Healthcare Website | Non-Profit Website | Product Testing Website |
| Community Website | Influencer Website | Online Course Website | School Website |
| Coupon Website | Insurance Website | Personal Website | Trading Website |
… and many many more. Actually there are endless possibilities for you. Now that we have discussed the basics, let’s get started.
Step #1: Choosing WordPress as your Platform
Not a long time ago you had to have a decent set of skills in order to create a website. At least you had to learn HTML – the standard “language” for displaying your website in a web browser. But that’s not it. Additionally, you would need to have a decent knowledge on CSS (defines how your website looks) and JavaScript (makes your website interactive and much more).
Well luckily these times are gone. Nowadays you have the opportunity to choose from a wide range of tools that can help you create a professional website with none of these skills. What you have to do is use a so called Content Management System (CMS). So let’s have a look at them.
Content Management Systems
Let’s start by listing some of the most popular CMS.
- Concrete 5
- Drupal
- Joomla!
- Squarespace
- Typo 3
- Wix
- WordPress
Obviously there are quite some CMS out there. So what are the differences?
Flexibility
First of all CMS vary in terms of flexibility. Basically this means that some platforms are super flexible and you are able to create every website you can think of – business websites, eCommerce websites and so on. Their flexibility of course sometimes can make them a little bit more complicated to use. Others on the other hand only allow you to create certain websites with very limited options for customization.
Pricing
Some CMS are for free, some are not. Usually the CMS that are not for free (e.g. Squarespace) do not just offer a CMS but also additional services like a free Domain and Web Hosting.
In this guide we will be using WordPress.
Why Choose WordPress
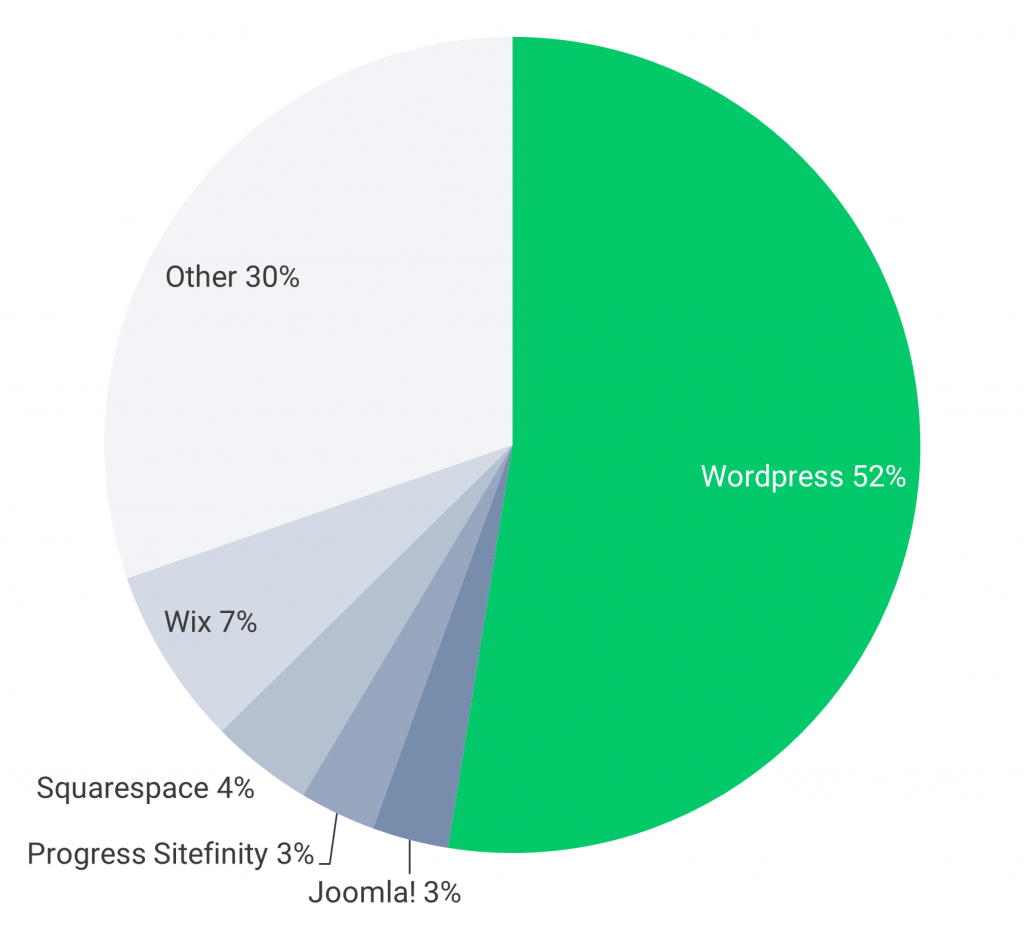
WordPress is by far the most often used CMS that is on the web. The statistics made by Builtwith shows that more than 50% of all CMS on the web are powered by WordPress.
What are the advantages of using a popular and frequently used CMS?
Next to the fact that WordPress is totally free there are several other arguments that speak for this CMS.
User Friendly
A reason why WordPress became so popular is that it’s super simple to use. Thus it’s ideal for beginners and others who just want to start out making a website on their own. When you know how to use standard office programs like Word, you already have all the necessary skills to publish your own content on WordPress.
Future Proof
You can’t go wrong when choosing WordPress. Some facts that speak for WordPress are support, security and updates.
- Support: You are stuck or have a problem you can’t solve by yourself. No need to worry. Because probably every issue you might face with WordPress has already been solved for you. There is a plethora of support forums and guidelines on the web that will help you. Therefore just search for your problem in a search engine and in no time you are very likely to find a solution to your problem.
- Security: With a CMS as popular as WordPress you can be sure that a lot of people take care of security issues that might pop up.
- Constant Updates and Bug fixes: There is a huge community that contributes to the sourcecode of WordPress and fixes issues.
Extendable
There are more than 55.000 so called plugins (small tools to give your website some extra functionality) available for WordPress (you can see a list of plugins here: https://wordpress.org/plugins/). This basically means the following: For every need you might have, that’s not already covered by WordPress out of the box, there is a huge chance that there is a plugin for that already out there.
Now that we know which CMS we will be using, it’s time to get a domain name and a web hosting.With this we make it possible to be seen on the web.
Step #2: Secure a Domain Name and Fast Web Hosting
Before we start, let’s clarify some terms that might not be common to you.
Domain name
This is the web address for your website like yoursite.com
Web hosting
This is something like a service that serves your website on the internet. In order to store your CMS, your images, the content of your website – basically everything that is related to your website – you need a web hosting. So without a web hosting your website is not visible.
Hint: Still confused? Just think about the following: Let’s consider your domain name as a postal address in a city (the Internet). Hence in this scenario your web hosting would be like a house within this city. So without a postal address no one would be able to come to your house. And without a house there would just be a blank space when visiting your postal address 😉
The task of choosing a decent domain name and a good web hosting is an important step. In the following we will discuss some critical factors you should think of.
Things to consider for a domain name and web hosting
Do not just choose a domain and a web hosting randomly. Here are some of our thoughts on what you should consider when choosing a domain name and a hosting.
Choosing a decent domain name – what to consider
Finding the right domain name can be a challenging task sometimes. In order to help you we have written down some tips for you. Just keep them in mind when choosing a domain name:
- Make it easy to remember
- Make it catchy
- Make it unique
- The most valuable and important domains are domains that end with
.com - When you want to target a local audience go for the top level local domains (like
defor Germany oresfor Spain)
Pro-Tip: You don’t want to have a domain name which you still have to spell. Therefore easy to remember also means easy and unambiguous to write.
Choosing a hosting– what to consider
Hosting services normally offer you several hosting plans to choose from. But which plan is the best for you? Well this basically depends on what you are planning to do with your website. Some things you should check:
- Do they offer SSL encryption? (For a https URLs)
You should go for a hosting that offers SSL
(You can read more about SSL encryption in our SEO Quickstart Guide) - Do they fulfill all the requirements that your CMS has?
With this we mean e.g. a proper PHP-Version or the support of a MySQL-Database. Both is required for WordPress.
(You can check the requirements on the official WordPress Website) - Do they have unlimited or a restricted bandwidth?
The more bandwidth the better. Usually good hosting services offer unlimited bandwidth.
More thoughts on hosting services
Probably you won’t be able to find a cheap hoster that offers you everything you desire. Therefore you should prioritize. When you define a set of key requirements you really need then you have a much better possibility to choose the hosting service that is the best for you. So how to prioritize? This pretty much depends on the goal of your website (see Step #0).
So let’s say the goal of your website is to show your awesome photography skills. What should an ideal hosting service offer? For example it should offer unlimited bandwith and huge webspace in general. This is because you will probably serve a lot of pictures.
- First this means a big bandwidth consumption everytime a user wants to access your pictures.
- Second you actually need a big enough webspace to store all your images. On the other hand if your primarily goal is to provide your content super fast, you might want to look for hosting services that offer you alot of speed, performance and response time.
Now that we have clarified what a domain name and web hosting is and what you should consider, let’s see how to get them. In case you already have a domain name and a hosting you can skip this step.
Where to get a domain name and a hosting?
There are basically thousands of services available that either offer you a domain name or a hosting or even both. A lot of those companies offer you different plans to choose from ( A lot of services also offer extra plans especially for WordPress). Normally you can easily upgrade from one plan to another. So starting out with a cheap plan does not mean that you are stick to that one forever. Some also give you the chance to try out their service almost for free in the first month(s).
Hint: As you need both a domain name and a web hosting (in case you don’t have any of these already) we highly recommend that you choose a provider that offers both in one place. Like this, the setup is way easier.
So what are some “all in one” providers? Some are:
For this guide we show you the complete process on how to register a domain name and get a web hosting from GoDaddy.
Domain and Hosting from GoDaddy
In this example we will show you how to register a domain and get a hosting from GoDaddy. This is just an example, so feel free to choose another hoster if you want.
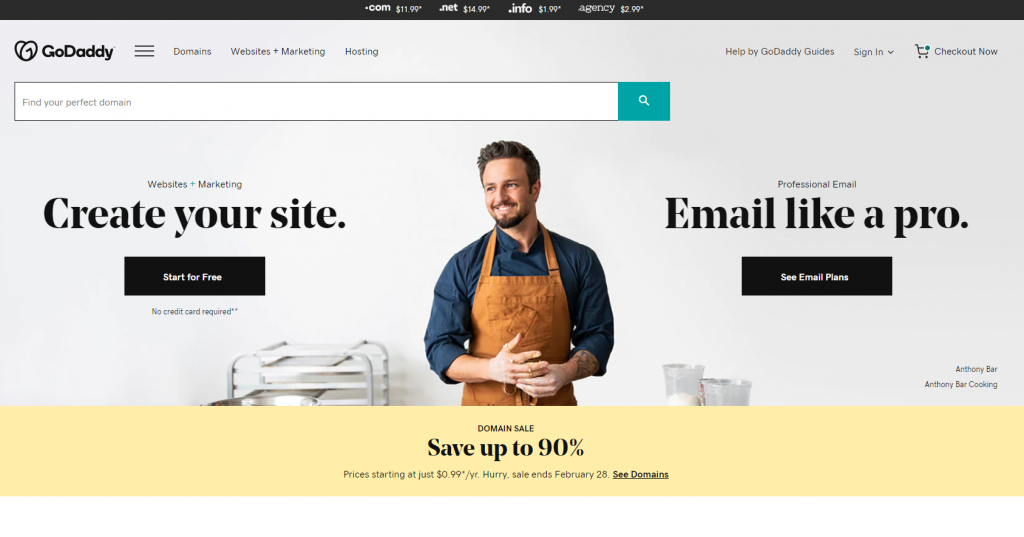
Step 1 – Access GoDaddy
The first step is simple. Just go to www.godaddy.com
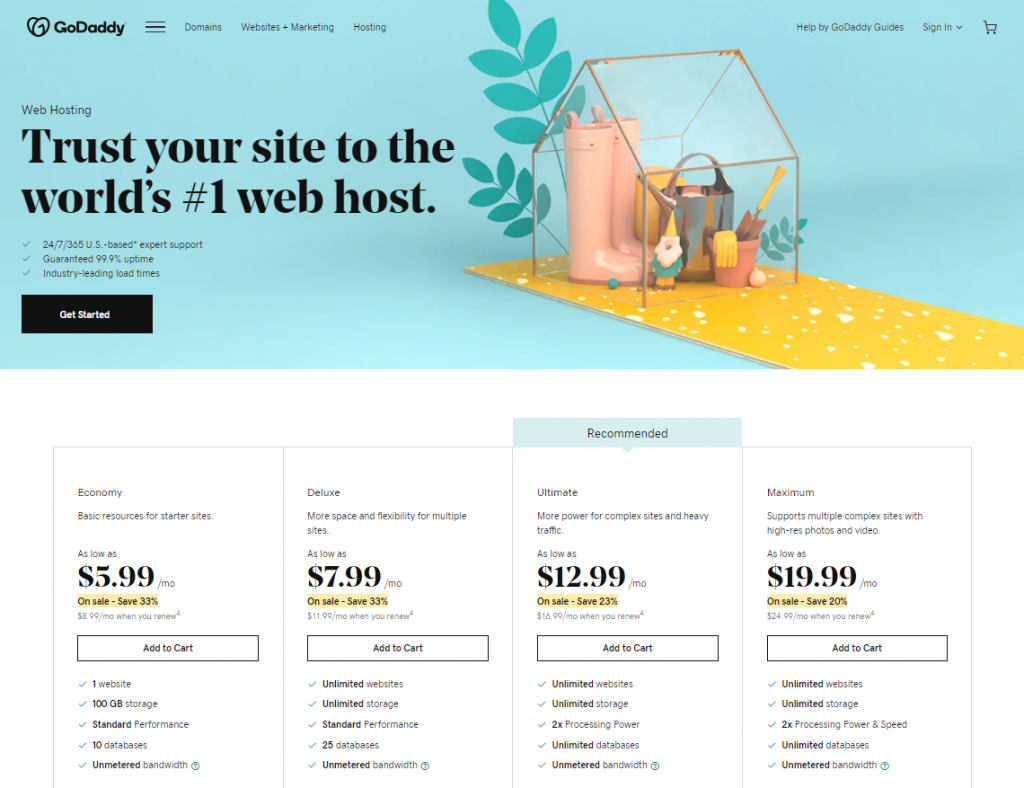
Step 2 – Choose a Plan
In the main navigation click on “Hosting” and you will access the site where you can choose between different hosting plans. Exemplarily we will choose the “Economy Hosting Plan”. This is the cheapest one. Also this hosting plan already comes with a free domain.
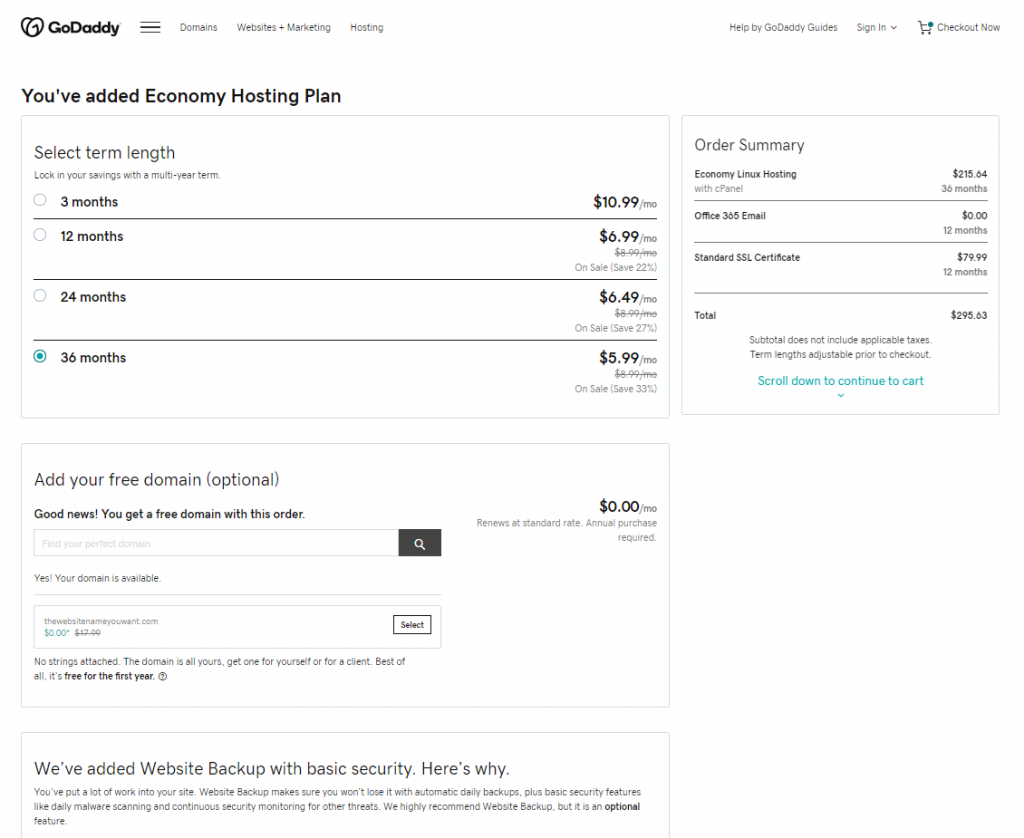
Step 3 – Select your Options
Within this step your are able to define the term length of your hosting. There is one general rule of thumb. The longer the term the more money you save each month.
As an example for our domain we have entered thewebsitenameyouwant.com.
We also recommend that you order a SSL Certificate. To do so, select one at the bottom of the page.
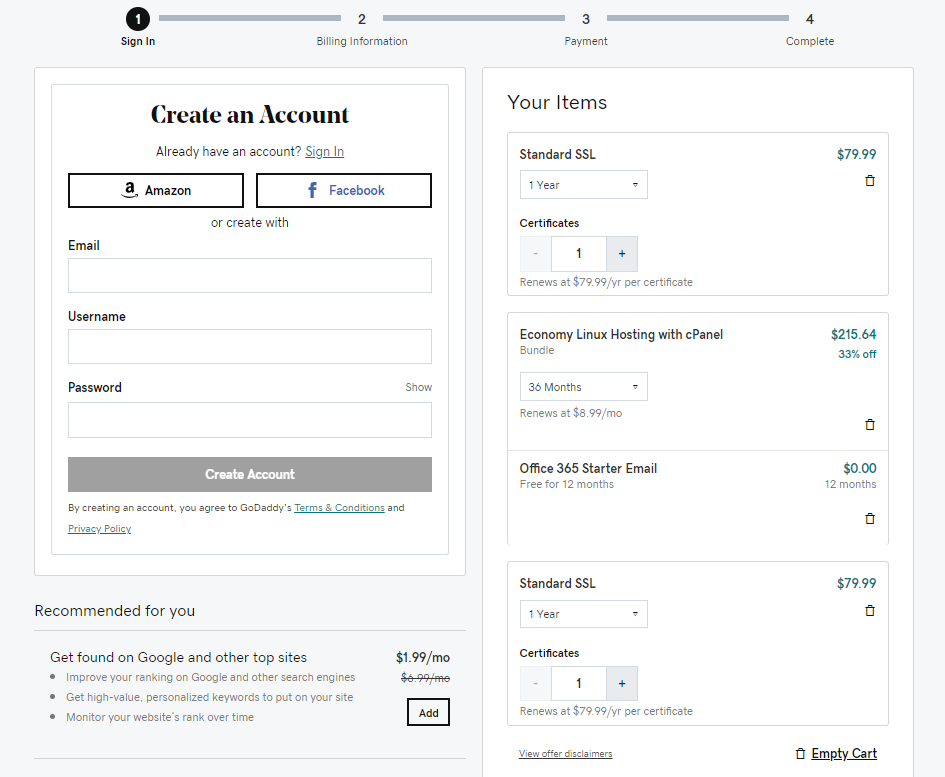
Step 4 – Check your Order
Finally enter your billing information and check your order.
With this step we have created the possibility for visitors to actually come to our website. However we still do not have a website to show to them. This is what we are going to do now.
Step #3: Installing WordPress
Now that we have a domain name and web hosting place, we can start installing WordPress. This might sound complicated for some but actually it is pretty simple to install WordPress. There are two possible ways to install WordPress. You can install WordPress with a 1-click installation from the dashboard of a lot of web hosters. Or you do a manual installation of WordPress, which means uploading and installing WordPress by hand. Both ways are absolutely doable for beginners. Therefore we will show you both approaches.
1-click Installation
A 1-click installation will greatly vary between web hosters. So you might want to check the help-section of your web hoster if you are not quite sure how to do it. In this example we will show you how to install WordPress with a 1-click installation from GoDaddy. The instructions are from their official help guidelines. Thus you can directly access the instructions here.
- Log in to your GoDaddy account.
- Click Web Hosting.
- Next to the hosting account you want to use, click Manage.
- Under Options & Settings in the Popular Apps section, click WordPress.
- Click the Install button.
- Complete the on-screen fields, and then click OK:
- Domain — Select the domain on your account you want to use.
- Directory — Enter the directory after the domain name where you want to install WordPress. If you want the domain name itself to use WordPress, the directory field should be left blank.
- Enter an Admin Name, an Admin Password (and its confirmation), an Email Address and the Blog Title.
WordPress will be installed to your hosting account with the options you selected within 24 hours. When it’s complete, you’ll receive a confirmation email.
Manual Installation
Hint: This is only one possible way of installing WordPress manually. There are also other approaches to reach the same goal. Many other ways are described in the official guidelines in how to install WordPress.
In case your web hoster does not offer a 1-click installation or you would like to install WordPress manually anyway, here are the steps. Don’t worry, installing WordPress manually is no rocket science at all.
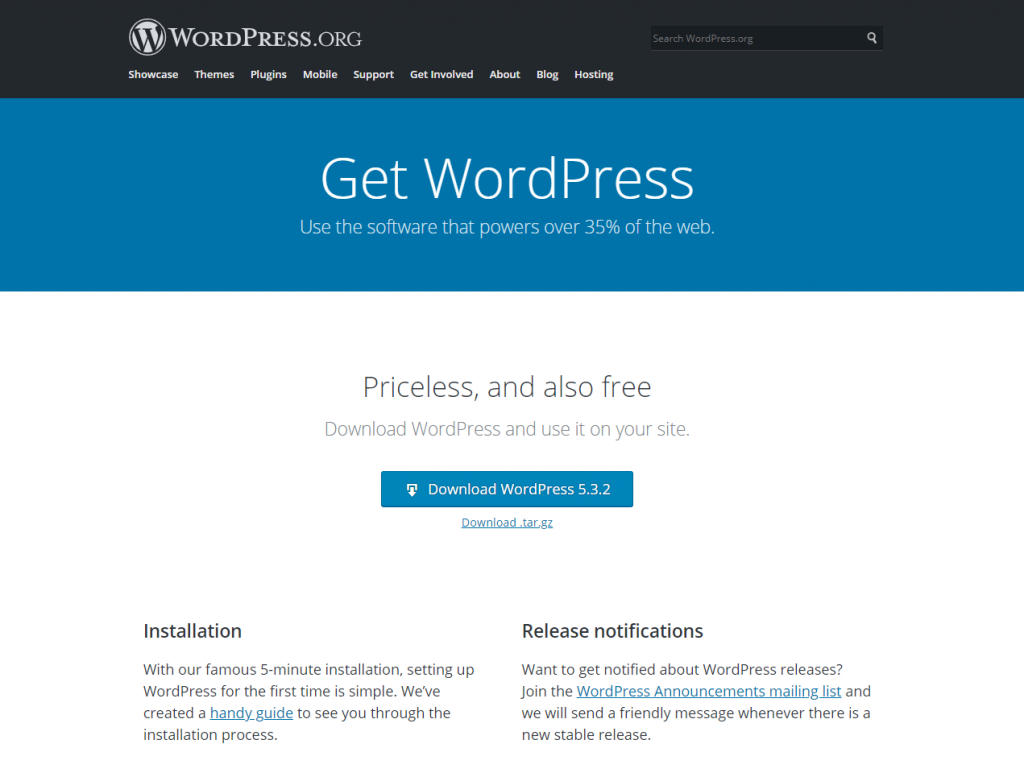
Step 1 – Download WordPress
Go to https://wordpress.org/download/ and download the latest version of WordPress to your local drive.
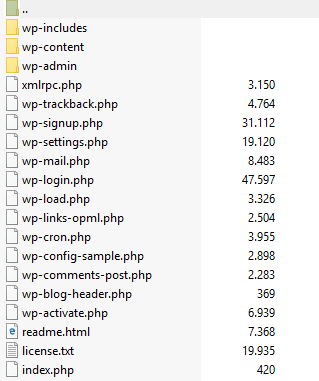
Step 2 – Unzip
Unzip the downloaded file to a new folder somewhere on your local drive.
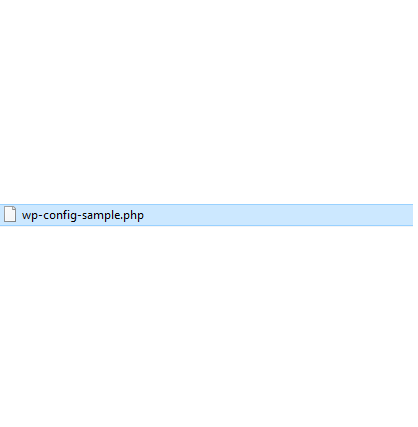
Step 3 – WP-Config
Within the newly created folder which now should contain all files for WordPress, search for the file called wp-config-sample.php and rename it to wp-config.php.
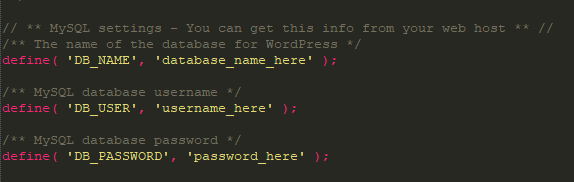
Step 4 – Setting up the Database
Open the renamed file wp-config.php with a text editor of your choice (e.g. notepad) and search for the following lines:
define(‘DB_NAME’, ‘database_name_here’);- Replace ‘database_name_here’ with the name of your MySQL database
define(‘DB_USER’, ‘username_here’);- Replace ‘username_here’ with the user name of your MySQL database
define(‘DB_PASSWORD’, ‘password_here’);- Replace ‘password_here’ with the password for your MySQL database
All necessary information can be obtained from your web hoster.
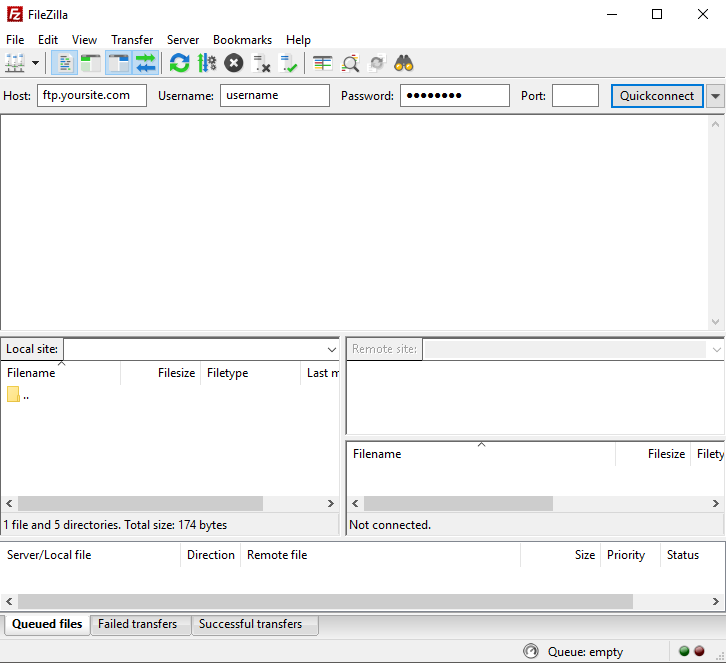
Step 5 – Upload WordPress
In the previous steps we have done all the necessary changes to our WordPress installation. So now it’s time to upload the files to our web hoster. In order to upload files to your web hoster you normally use a tool called a FTP-Client. When you don’t already have a FTP-Client download one (e.g. FielZilla). After that insert the credentials to login to your web hoster (usually this is something like ftp.yoursite.com, a username and a password). Then upload all the WordPress files.
Hint: Your domain will point to a directory of the server of your web hoster. In case you want your domain to show your WordPress website it needs to point to the folder you uploaded WordPress to.
E.g. yoursite.com needs to point to /wordpress/ when you installed WordPress into that folder.
Step 6 – Finalize Installation
Congratulations you are almost done!
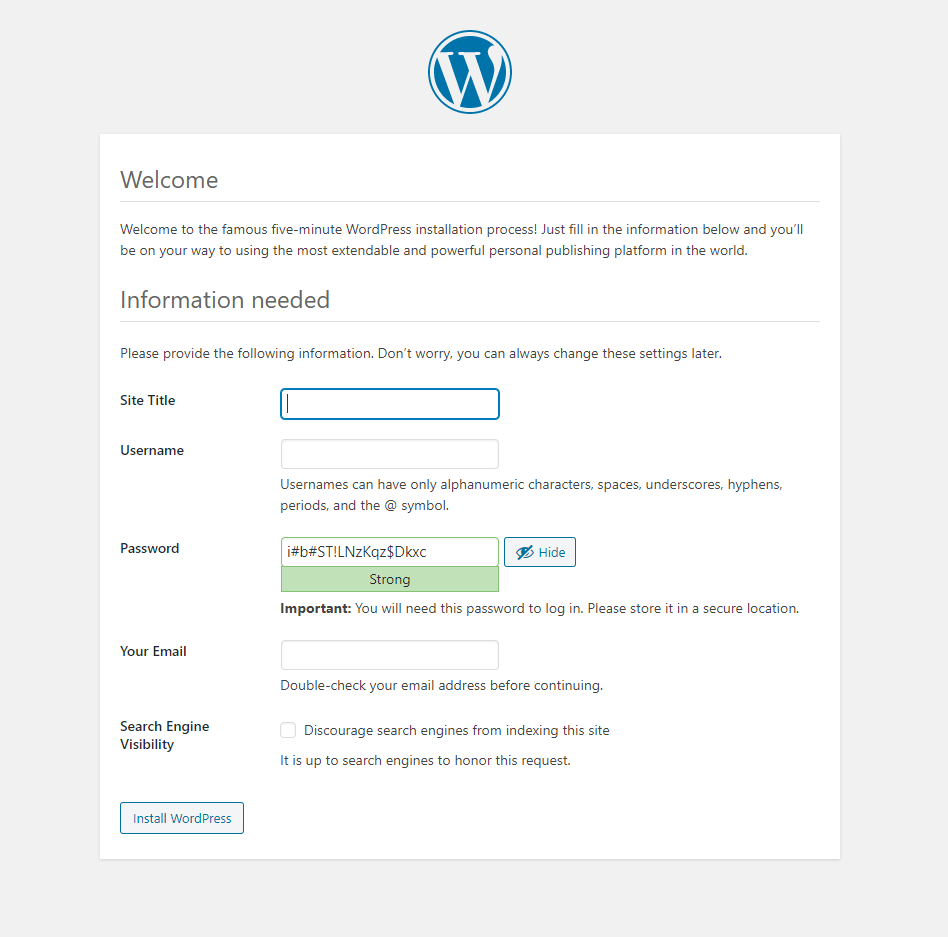
Depending on where you have uploaded your WordPress installation in the previous step, you should now be able to access WordPress via the URL:yoursite.com/wp-admin/install.php
Finally you can finish the installation process by entering a site title for your website, a username, password and an email address.
Step #4: Set up and Customize Your Website
After you have completed the steps for the 1-click or manual installation you now should be able to see your newly created WordPress website! It should look something like this. Celebrate your achievement 😎 you have already come a long way!
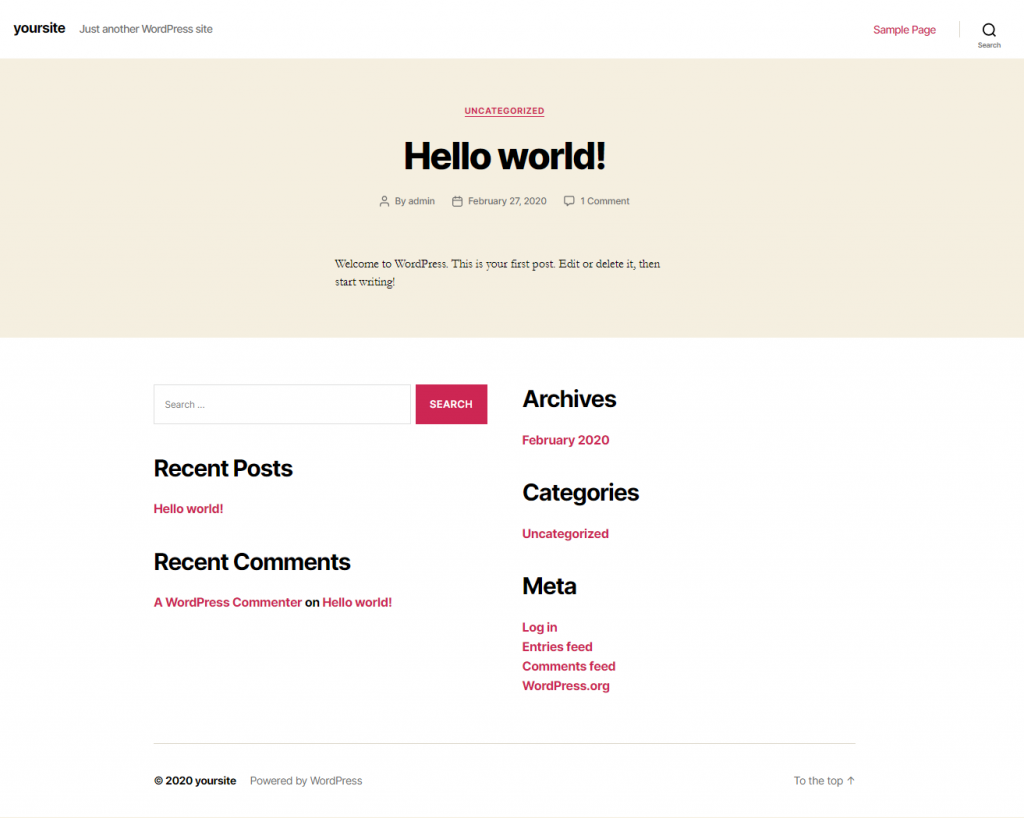
Hint: To view your website you have to navigate to your domain. Example: yoursite.com
Finally we are ready to customize our newly created website to our needs. We can do this from the WordPress Dashboard. This is basically the place where we do all the modifications to our website. This for example includes creating content for our website or changing the look and feel of it. In this step we will show you the most important things you can do with the Dashboard. These are:
- Install a Theme
- Add Content to your Website
- Set up the Navigation of your Website
- Customize your Theme / Website
- Installing Plugins
When you have completed these steps, you are ready to get your site online. But now first things first, let’s start by accessing our Dashboard.
Login to your WordPress Dashboard
By default, you can login to your dashboard by adding /wp-admin to your domain name. So when your domain name is yoursite.com and you linked your domain to point to WordPress, you are able to access your Dashboard by typing yoursite.com/wp-admin into your browser.
Pro-Tip: Hackers also know that the login of your WordPress site is located under /wp-admin. Hence there are several Plugins available for WordPress that let you change the url to your Dashboard to hide it from hackers.
After typing in the correct URL to access your dashboard, you will see a login screen (Step1). Afterwards enter your username and password in the form. In case your username and password was entered correctly you can access your dashboard (Step2).
Step 1
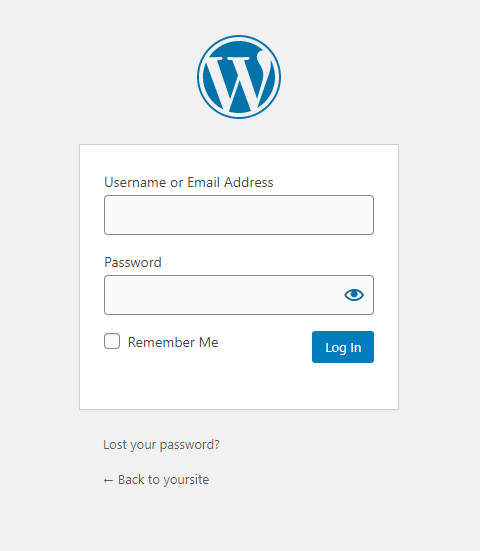
Step 2
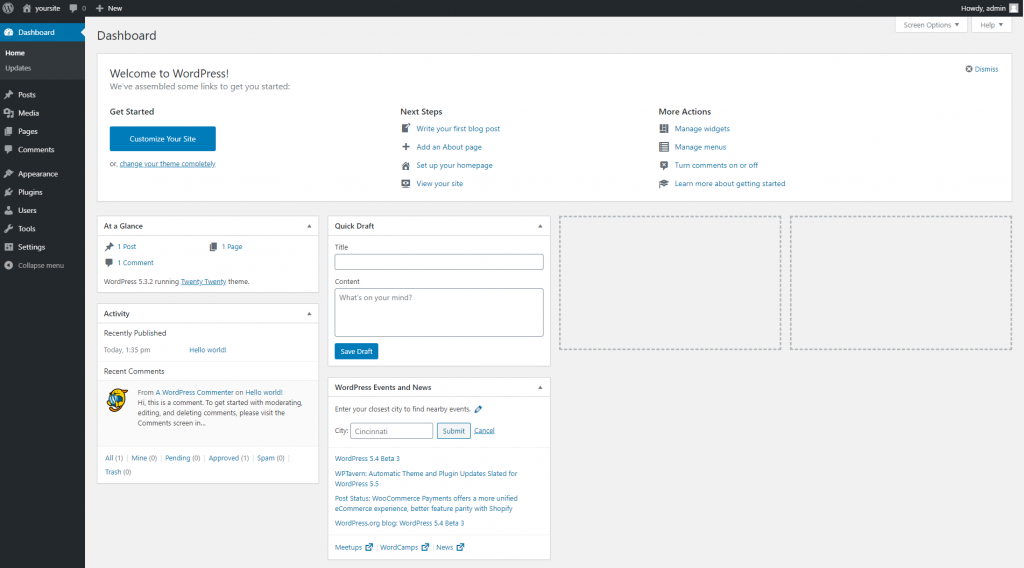
The dashboard might look a little bit intimidating at first. But don’t worry it’s pretty easy and we will talk about the most important functions in this guide.
How to set up a theme
A freshly installed WordPress, will use the standard theme that is shipped with WordPress. For the year 2020 this is the TwentyTwenty Theme. Now you probably might ask…what’s a theme?
Theme
This is a design template that defines how your website looks.
For WordPress there are thousands of free (e.g. wordpress.org/themes/) and premium themes (e.g. on themeforest.com or templatemonster.com) available. So let’s first check out how a theme can be found and installed. Accordingly there are two steps involved here.
- We have to choose a theme
- After that we have to install the choosen theme
We will cover these steps now.
Choosing and installing a theme
This is what you have to do.
Choosing a theme
These are the steps to choose a theme (from within your Dashboard).
Step 1
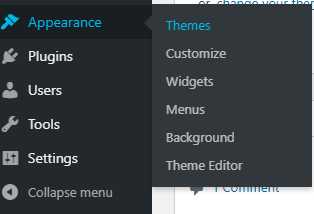
In your Dashboard, click on the Appearance button and then on Themes (Appearance > Themes). As a result this will take you to an overview page. All the themes that are already installed in your CMS are displayed here.
Step 2
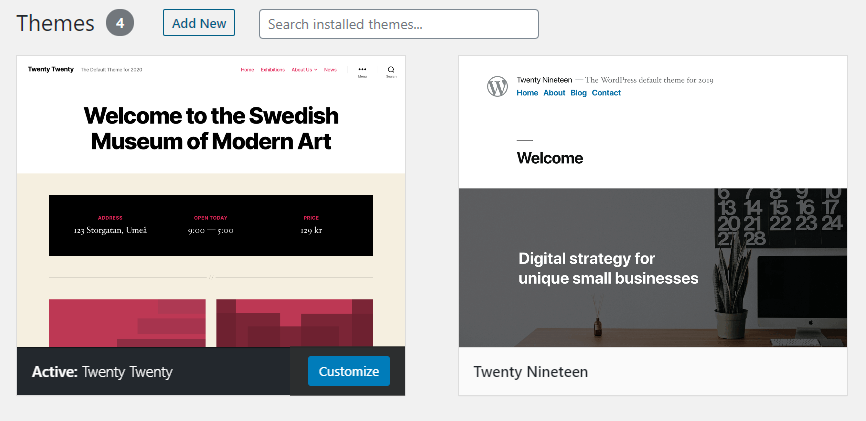
To add a new theme you have to click on the Add New button.
Step 3
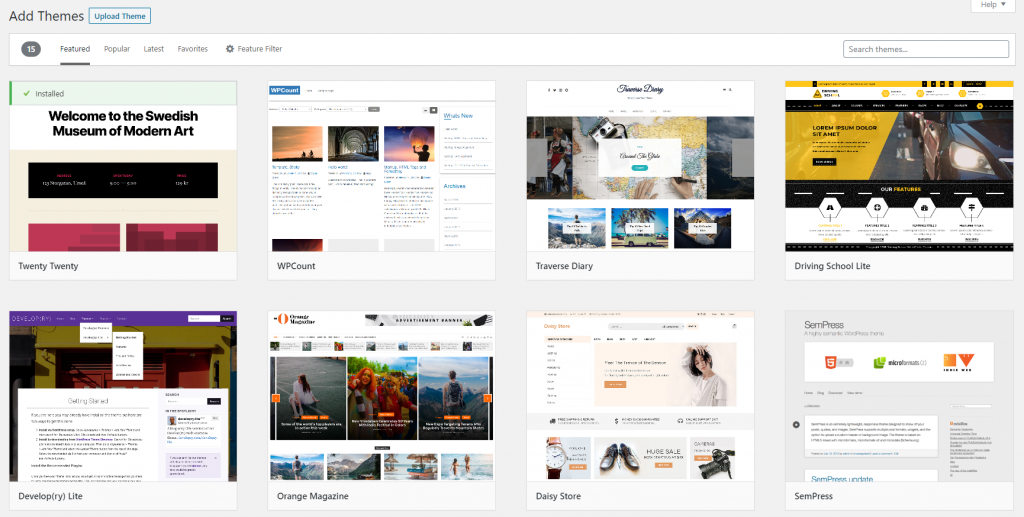
This screen lets you search for all available themes from the official WordPress Directory, which can also be accessed from wordpress.org/themes/.
With the help of the filter options you can refine what you are searching for. This for example means the popular or latest themes. In the Feature Filter you can more exactly define what you are searching for e.g. the subject of your website (ecommerce, blog, entertainment…).
Pro-Tip: Did you notice the “Upload Theme” function? This is where you would go in order to upload a theme that is not in the list of themes from the WordPress Directory. Some examples are premium themes that you downloaded from marketplaces like Themeforest or Templatemonster.
Install and Activate the theme of your choice
After you have found a theme you like, you either click or hover the theme of your choice. Then you will see a button that should say “Install”. Click this button in order to install the theme. The last step is to activate the theme. Consider that only one theme can be active at a time. Once again hover the theme you would like to activate and click the button “activate”.
How to add Content to your Website – Posts and Pages
Now that we know how to install a cool new theme, the next step is to add content to your website. WordPress basically distinguishes between Pages and Posts. So what are the differences?
Posts
They are usually your choice when you want to write a blog post. Therefore, by default, they are listed in reverse chronological order (latest post is the first post to be displayed). Tags or categories can be assigned to posts in order to organize them.
Pages
They usually contain static content. So in case you want to create something like a “contact” or “about me” you would do this with a page.
How to create a Post
Within your Dashboard look for the section called “Posts”. Then go to “Add New”. This should bring you to a screen like the following.
Hint: The look of your screen might vary, based on the theme you are using. In our example we use the TwentyTwenty theme.
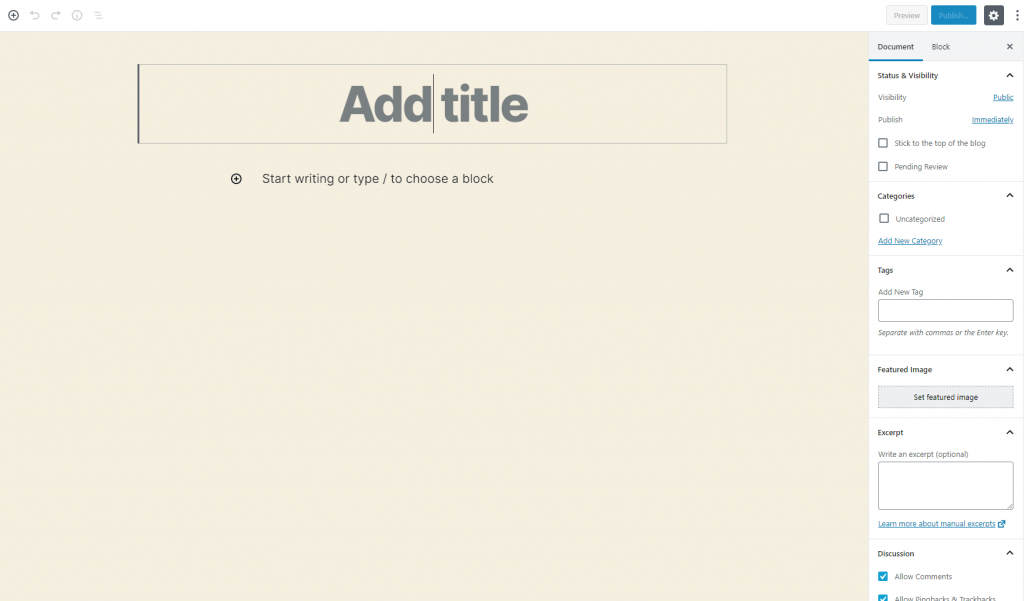
The screenshot shows an editor. This is your editor to create all your content for a Post. With the help of the editor you can add text, images, videos, shortcodes and many more things to your content.
Pro-Tip: The editor can be displayed in a “visual” and a “text” mode. The visual mode lets you see all your content, like the formatting of a text, right away (see screenshot). This is called a WYSIWYG editor (WhatYouSeeIsWhatYouGet). The text mode on the other hand lets you view the sourcecode (HTML) of your content.
Once you are done creating your content, you need to save it. Here you have two choices: “Publish” or “Save Draft” (on the top right of the screen).
- Publish: When you want your Post to be visible to everyone who visits your site then you have to Publish your Post.
- Save Draft: On the other hand, when you are not done yet with your Post you save it as a draft. A draft is not visible on your Website. It can only be accessed from the WordPress Dashboard.
In case you want to preview your Post just click on the “Preview” button and a new tab will open with your newly created Post. Additionally if you want to create categories and tags for your Posts, you can do so on the right sidebar.
How to create a Page
Creating a page exactly involves the steps you would take in order to create a Post. The only difference is the following:
When you want to create a Page look for the section called “Pages” within your dashboard . Then go to “Add New”.
Also Pages (out of the box) do not offer the possibility to create categories or tags. Thus they are exclusively for Posts.
How to set up the Navigation Menu
Within the navigation menu you can set up the Posts, Pages or manual links of your choice. They are shown in the navigation bar or other places of your theme. Normally a default navigation bar is displayed on the top of your website. Here’s an example of the TwentyTwenty theme navigation bar:

This is the default look of the navigation bar, after you have installed WordPress. The “Sample Page” is the only link in your navigation. In order to edit the navigation menu, look for the section that is called “Appearance” on the left of side of your dashboard. Then within “Appearance” click on “Menus”.
Setup or edit a Menu
In this screen you are able to add Pages, Posts or manual links to your menu. Setting up or editing the navigation menu involves the following steps:
Step 1 – Create (Optional)
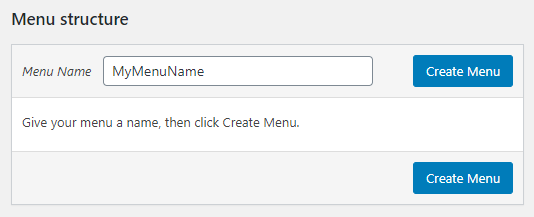
Before you can add anything to your navigation menu you have to create one (in case there is not already one set up by default). To do so, search for “Menu Structure” on the page and enter a Menu Name. Then click “Create Menu”.
Step 2 – Add
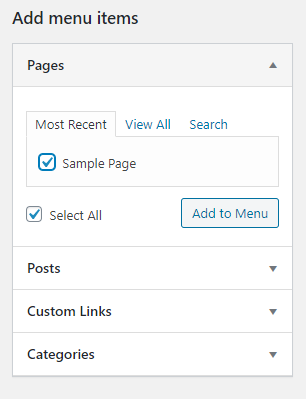
In order to add one or more Post(s) or Page(s) to your menu, just select them. Then click on “Add to Menu”.
Step 3 – Arrange
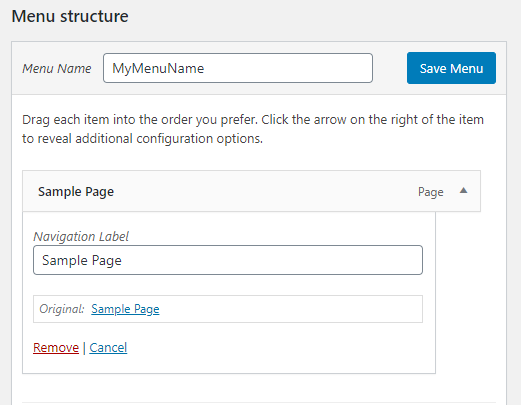
In the “Menu Structure” section you can then move them around by clicking and dragging them to the place of your choice.
Step 4 – Select and Save
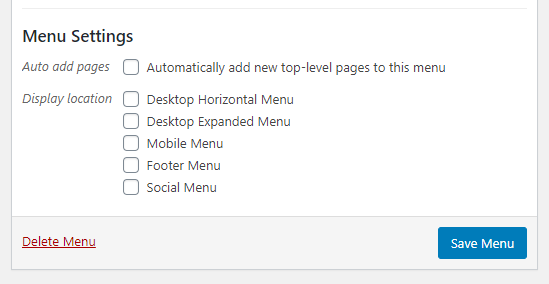
Now that you have created or modified a navigation menu you need to assign the menu to a certain location. Normally Themes offer you different locations (called display location) to show your menu. Some also offer you the possibility to use different menus for mobile or desktop users. All of those settings are configured in the “menu Settings” within the “Menu Structure” section.
When your are done with everything don’t forget to click the “Save Menu” button.
Customize your Website – Using the Customizer
Let’s continue customizing your website. In order to do this, we use the so called WordPress Customizer.
Accessing the Customizer
How to access the Customizer? In your WordPress Dashboard look for the section called “Appearance” on the left side of your Dashboard. Then within “Appearance” click on “Customize”.
Pro-Tip: This is just one way to access the Customizer options. Another way is to directly access the Customizer from a WordPress Page or Post you are on. When you are logged in to WordPress and navigate around your site, you should see a gray bar on top.
![]()
Thats the so called “admin bar”. Inside this admin bar is a button called “Customize”. When you click this button you can directly access the Customizer.
The Customizer – An Overview
After accessing the Customizer you should see a screen that is similar to this one. Once again, what you see highly depends on your theme.
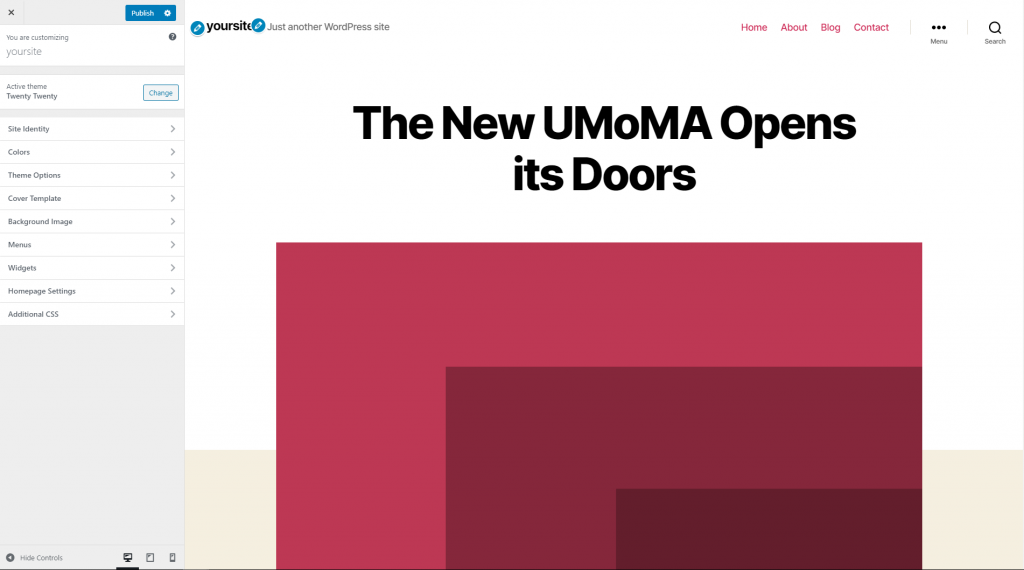
As you can see the Customizer view is divided into two main parts. On the left side there is a menu structure. Inside this menu structure there are several options to modify the look and feel of your website. On the right side you see your website in a live preview. All the changes you apply to your site will be reflected in the live preview. Once you are done with editing your site you need to publish your changes. To do so you need to click the “Publish” button which is located on the top left.
Pro-Tip: If you messed up something in the Customizer and you do not know how to set back your changes, do the following. Just don’t save your changes and refresh your browser (click F5). Your Customizer will then reload and your unsaved changes are gone.
So what can you can you customize? Basically this heavily depends on the theme you are using. Some themes (especially premium themes) give you the freedom to modify almost anything while others are very restrictive.
Installing a Plugin
Hint: You need a comprehensive instruction for Plugins? Then check our easy to follow tutorial on How to Install WordPress Plugins.
Now that we are able to customize our website, maybe we would want to add some extra functionally, which our theme does not seem to have right out of the box (e.g. the possibility to sell products). Therefore you need so called plugins. With plugins you can add some extra functionally to your website. For example you can setup an eCommerce shop or you can speed up your site or do SEO and many more things.
Let’s assume you know about a certain Plugin and you want to install it to your WordPress website. If you want to add that Plugin do the following:
Step 1
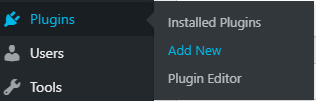
Within your dashboard look for the section called “Plugins” on the left of side of your dashboard then click on “Add New”.
Step 2
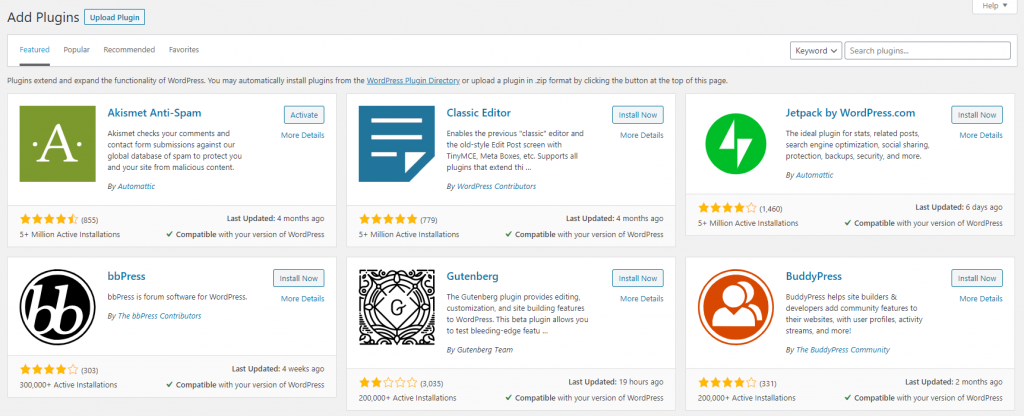
On this screen you can use the search function to search for the plugin you want. This screen lets you search for all available plugins from the official WordPress Directory. They can also be accessed from wordpress.org/plugins/.
Pro-Tip: Did you notice the “Upload Plugins” function? This is where you would go in order to upload a plugin that is not in the list of plugins from the WordPress Directory. For example premium plugins that you downloaded from marketplaces like Themeforest or Templatemonster are uploaded this way.
Step 3 – Install and Active a plugin of your choice
The process of installing a plugin is very similar to installing a theme. So after you have found the plugin of your choice you need to install it. Therefore click on the “Install” button. After that you need to activate the plugin by clicking the “Activate” button.
That’s it for the main part of this guide. You are now able to Install and Customize a WordPress Website that fits your needs and create content for it. Let’s continue with some extra Tips and Tricks.
(BONUS) Step #5: Tips and Tricks
As a bonus step we want to give you some thoughts on several important topics. This section should especially make you aware of the next steps you can or should take to take your website and your business to the next level.
How to get a logo
Nowadays you don’t have to be a designer to get a good and professional looking logo. So the first tip we want to give you is the following: Just head out to marketplaces on which designers can be hired to create a logo for you. This is not as expensive as you might think. More importantly a professional logo is certaintly a must. Thus here are some sites where you can hire a designer (for not just a logo):
Where to get the best free stock images and mockups
Images and mockups are perfect to get across emotions or catch the attention of your users and they also breath life into your website. However you don’t have to spend alot of money for professional looking ones. Actually there are some very good sites that offer them completely for free (some also for commercial use). Please remember that you credit your sources in your website.
How to choose the right colors for your website
Choosing the right colors for your website is a vital task, because colors have a meaning. Therefore they will impart a tone and emotional impact on your site visitors. This is why selecting the right colors that fit to you and your website is important (of course this also counts for the colors of your logo. These colors should be in line with your website). Here are some basics when it comes to colors:
Red promotes things like: power, importance or youth
Orange promotes things like: friendliness, energy or uniqueness
Yellow promotes things like: happiness, enthusiasm or antiquity
Green promotes things like: growth, stability, financial themes or environmental themes
Blue promotes things like: calm, safety, openness or reliability
Purple promotes things like: luxury, romance or mystery
Black promotes things like: power, edginess or sophistication
White promotes things like: cleanliness, virtue or simplicity
Certainly having defined a target audience and a goal for your website helps you setting up the right colors. For example think about websites for financial services that use blue as one of their colors (e.g. https://www.americanexpress.com or https://www.barclaycard.com). They want to create the emotion of safety and reliability for their target audience. So blue was a reasonable decision.
How to choose the right Fonts for your Website
We have created a separate articles for this topic. Read our posts on How to Choose the right Fonts for your Website and the Top 10 Free Best Google Fonts.
Getting found on search engines like Google
Now that you have made a great website, you want visitors to find your site when they search for you. Next to a good SEO-Strategy (which will be covered in the SEO Quickstart section) you first of all have to make search engines notice your site. How do you do that? Well basically you have to tell them about you. Getting your site on Google for example involves the follow steps:
https://www.google.com/webmasters/tools/submit-url
Web Analytics
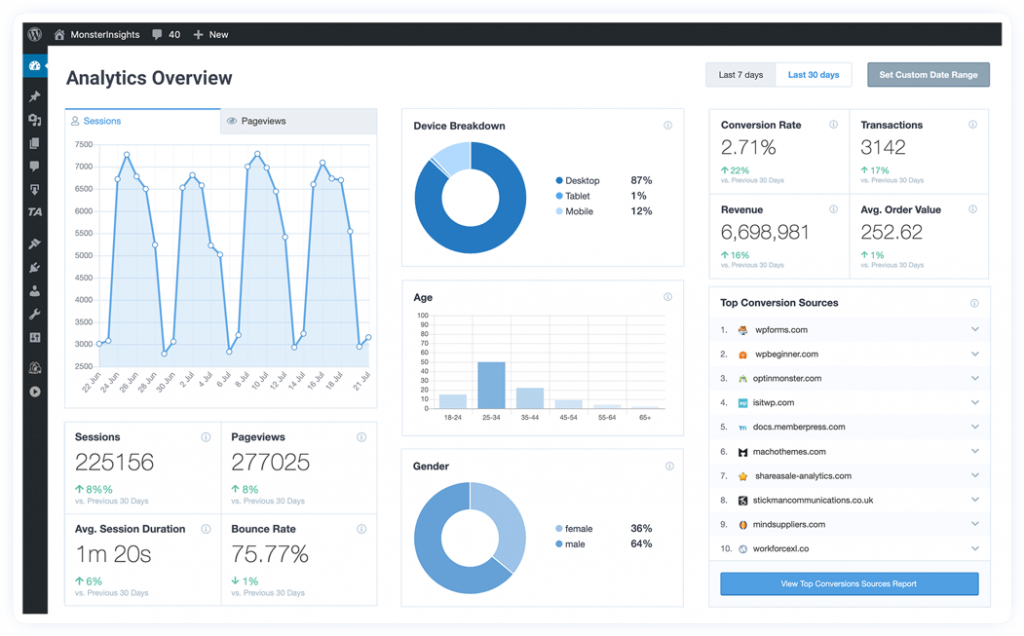
Tools for web analytics basically try to provide you with detailed information about your visitors e.g. the number of visitors on your site, how long they remained on a certain site, their age and gender, the country they live in, the browser used to navigate your site and many many more information. Therefore a good knowledge about these valuable information helps you optimize your site. For instance you could improve your content based on the information about your visitors. Here’s an example:
- If 90% of your visitors use mobile devices to access your site you might want to put more effort in optimizing your site for mobile than for desktop.
- If you know that especially one of your blog posts attracts a lot of visitors you might want to promote your product (in case you promote a product 😉 ) especially on this post in order to generate more clicks.
For WordPress there are some Plugins available for free that can help you with web analytics.
A very popular one is MonsterInsights that uses Google Analytics. More than 2.000.000 users rely on this plugin for WordPress.
SEO Quickstart
Our SEO Quickstart guide for WordPress got pretty big. Therefore we have created a separate article for it. You can access our SEO Quickstart for WordPress here.
Conclusion
We hope you found this guide useful. With the help of this guide you are now able to make your very own website from start to finish. Of course this guide did not get into all of the details (see our learning section for more content). However you now have that necessary big picture to start building. We wish you good luck! All the best and enjoy your day 🙂

I just signed up to your websites rss feed. Will you post more on this subject?
Hi XMC.PL 🙂
yes its planned to deliver more content on this subject in the future
Hi there colleagues, its impressive article about educationand entirely explained, keep it up all the time.
Thanks alot for your kind words 🙂
Hi, I do think this is an excellent website.
I stumbledupon it 😉 I may come back yet again since I book-marked it.
Money and freedom is the greatest way to
change, may you be rich and continue to guide others.
Useful info. Fortunate me I found your site unintentionally, and I’m surprised why this twist of fate did
not took place earlier! I bookmarked it.
Very descriptive article, I loved that a lot.
Will there be a part 2?
Thanks for your feedback. There will probably be a second part. thanks for your interest 🙂
I read this paragraph fully about the comparison of newest and
earlier technologies, it’s amazing article.
You really make it seem so easy with your presentation but I find
this topic to be really something which I think I would never understand.
It seems too complex and extremely broad for me. I am looking forward for your next post, I’ll
try to get the hang of it!
Very descriptive blog, I enjoyed that a lot. Will there be a part 2?