Preface
When you are new to WordPress one of the first question that arises is probably how to install a WordPress Plugin. In this tutorial we will cover exactly this in an easy to follow step by step explanation for beginners. This guide shows you how install any WordPress Plugin, free or premium (paid).
First things first. Basically there are two different ways to install WordPress Plugins. At the beginning of this tutorial we will cover the easiest way. With this method you select and install the Plugin directly from your WordPress Dashboard. Afterwards we will talk about the second method. The second method especially applies to premium (paid) WordPress Plugins. Here you will have to upload your Plugin to your WordPress Dashboard by yourself and then install it.
Hint: Using a WordPress Plugin is always a two step process.
Especially a lot of beginners miss the second step. Installing a Plugin is only the first step. You will not be able to use a Plugin when it is installed only. It also has to be activated. So always keep in mind that you also have to activate a Plugin once you have installed it.
Method 1 – Select and Install a WordPress Plugin from the WordPress Dashboard
The first method is pretty straitghtforward and easy. Only 6 simple steps are necessary.
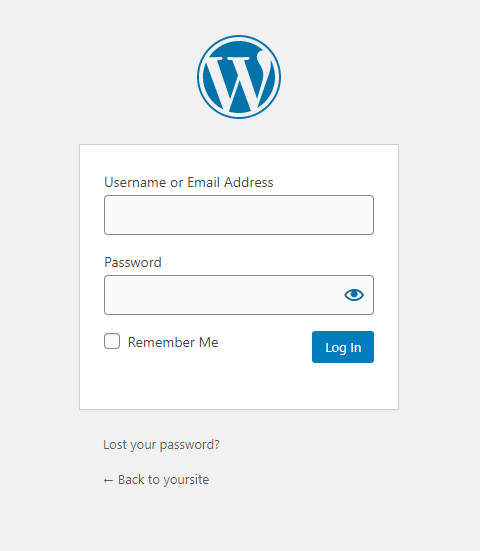
Step 1 – Access Your Dashboard
First of all we have to access the WordPress Dashboard. Usually the WordPress Dashboard of your website is accessed by entering the following url into your browseryoursite.com/wp-admin.
Step 2 – Access the Plugins
Once we have access to the Dashboard search for Plugins on the left sidebar.

Step 3 – The Plugins Menu
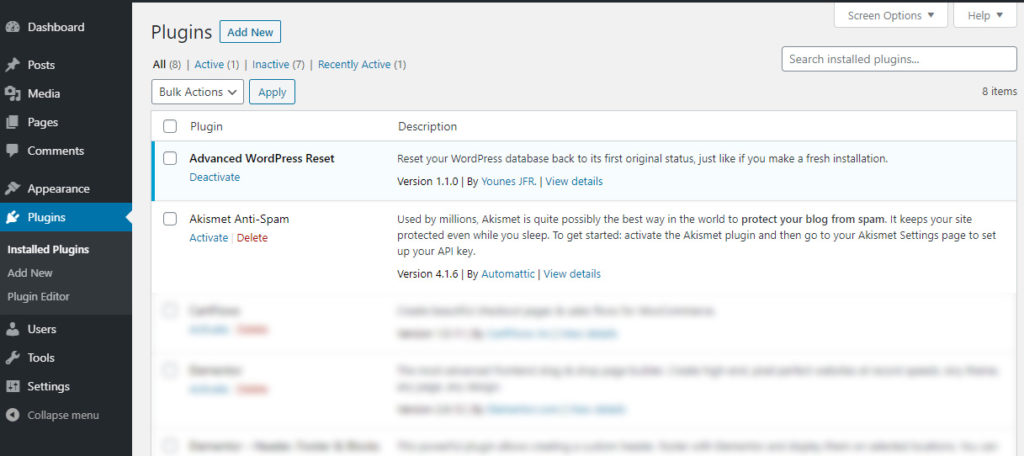
Now you should see the main menu for the Plugins. A Plugin overview of all the Plugins that are already installed (Installed Plugins can either be Active or Inactive) should be displayed in a list form.
Click on the Add New button.
Step 4 – Select your Plugin
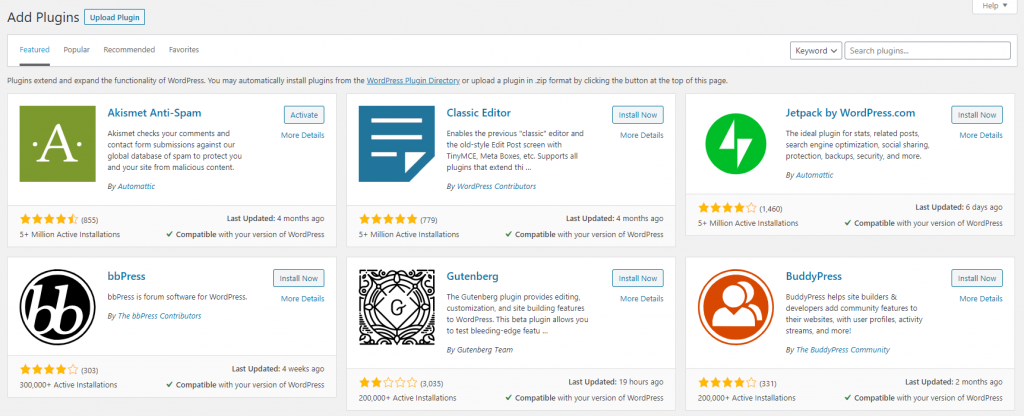
All the Plugins you can see here are from the official WordPress Directory. They can also be accessed from wordpress.org/plugins/.
In order to choose a Plugin, the best way is to search for it. Therefore use the search field on the right that says “Search Plugins” and enter the name of the plugin you want to install (Hint: You do not need to enter the full name)
As an Example we searched for the Elementor Page Builder.
Step 5 – Install the Plugin
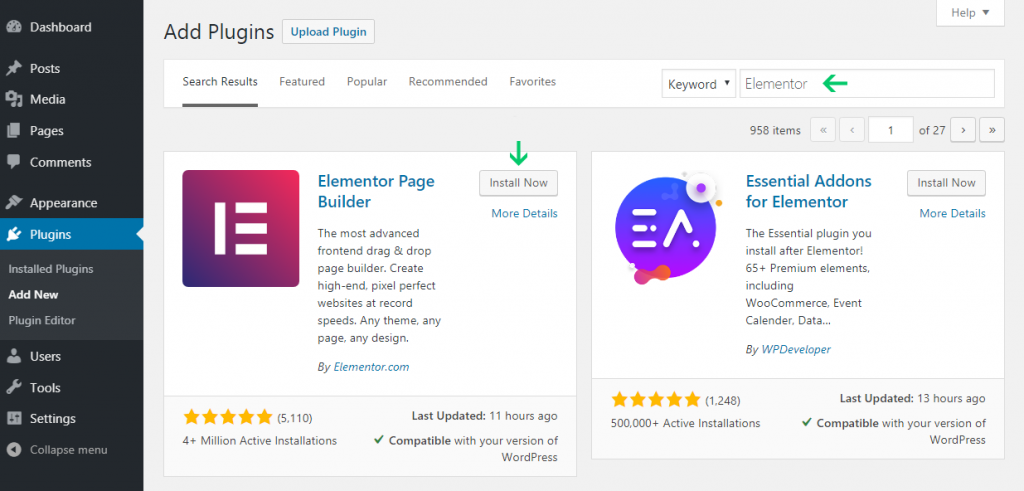
After having entered the name into the search field the list of all available plugins gets filtered automatically by your searchterm.
Next to the plugin of your choice, you should see a button that says “Install Now”. Click this button in order to install the plugin. In the background the plugin will then automatically be downloaded to your server and added to your wordpress/wp-content/plugins directory.
Step 6 – Activate the Plugin

The plugin is installed now on your WordPress site. However it’s not active yet. Remeber the button that said “Install Now”, next to your plugin? This button should now be labeled “Activate”. Click the button in order to activate the Plugin. Now you are done.
Hint: Alternatively you can activate / inactivate all Plugins from the Plugin overview from Step 3.
Method 2 – Installing a WordPress Plugin manually
The second method especially applies to premium (paid) WordPress Plugins. You won’t be able to find these kind of plugins in the WordPress Directory. Instead you download them from a marketplace (e.g. Themeforest or Templatemonster) and then manually add them to your WordPress website.
To manually add a WordPress Plugin you have two options. The first option is to upload the Plugin from your WordPress Dashboard. The second option is to manually upload the Plugin via FTP or an file transfer system/upload manager of your Hoster.
Install a WordPress Plugin manually from the Dashboard
The first steps are exactly the same as in the first method. So first lets access the WordPress Dashboard and go to the Plugins Menu (see Step 1 to Step 3 of Method 1). From within the Menu to Add Plugins do the following.
Step 1 – Upload Plugin Menu

In the Add Plugins Menu you should see a button on the top left that says “Upload Plugin”. Click the button.
Step 2 – Upload your Plugin
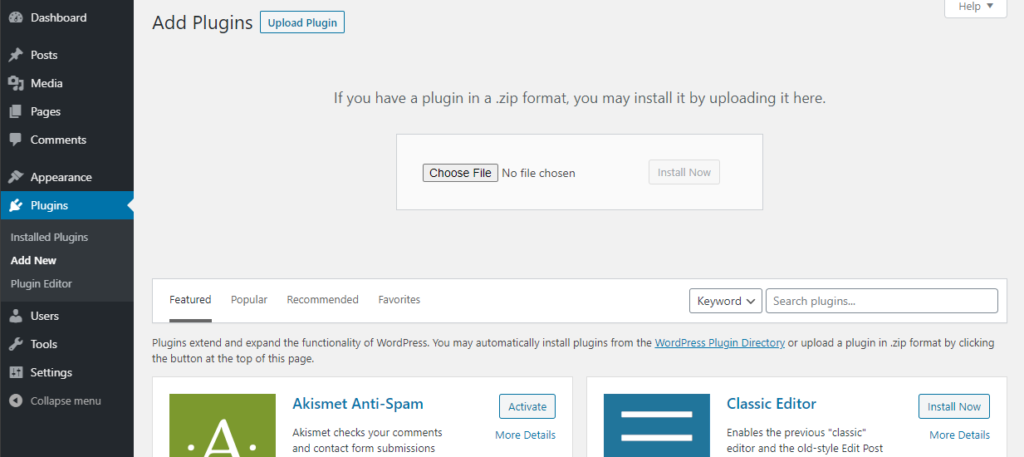
A new option should appear to upload your Plugin. Choose “select file” and upload your Plugin from your desktop. Next confirm the upload by clicking “Install Now”.
Step 3 – Activate the Plugin
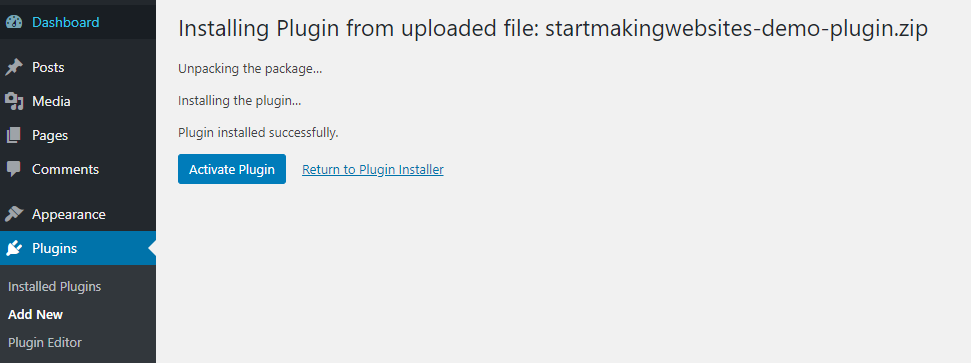
After the plugin is installed successfully you should see an option that says “Activate Plugin”. Click the link to activate the plugin.
Bonus – Install a WordPress Plugin via FTP
Both options we have covered by now use the WordPress Dashboard to install a Plugin. However there is an alternative to that. You can also install a Plugin without accessing the WordPress Dashboard. But you still have to activate the Plugin from the Dashboard.
In order to install a WordPress Plugin via FTP or the file transfer system of your Webhoster you have to upload the unzipped Plugin to the following folder of your WordPress installation:
<Your WordPress Root Directory>/wp-content/plugins
After you have uploaded the Plugin, the Plugin should have it’s own folder like this:
<Your WordPress Root Directory>/wp-content/plugins/<Your Plugin>
After you have uploaded your plugin, access your WordPress Dashboard. Your uploaded Plugin should now be in the list of all installed Plugins of your WordPress website (see the Steps 3 in Method 1). Activate the Plugin by clicking on “Activate” next to your uploaded Plugin.
Conclusion
That’s it for today. We have shown some easy ways on how to install WordPress Plugins, no matter if they are free or premium. We hope you could learn something new. If you like what you've read...why don't you share it 🙂


5 thoughts on “How to Install WordPress Plugins”