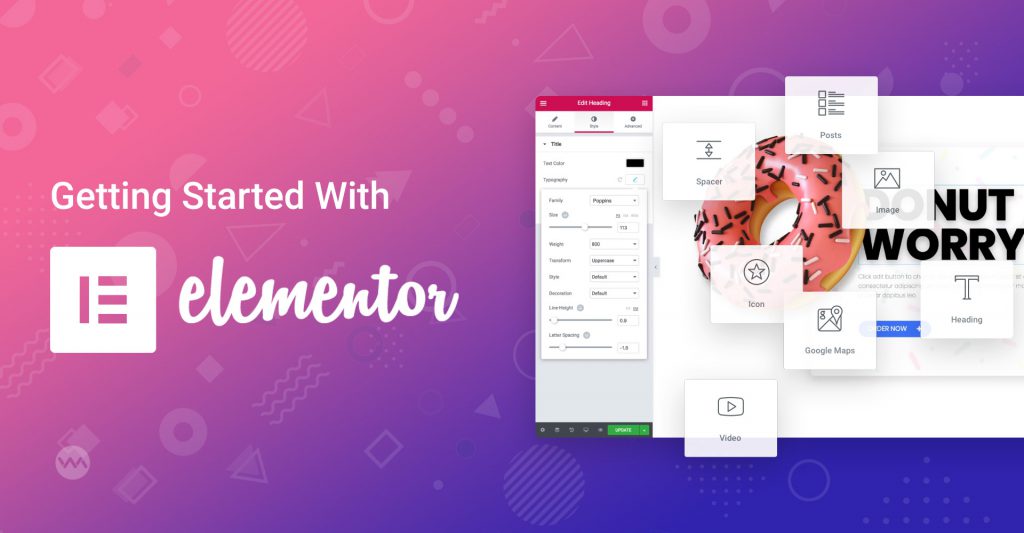
Preface
You want to start making visually stunning websites in WordPress fast, easy and without coding? Well, then Elementor is the right tool for you.
With this guide we will show you how to get started with Elementor. This visual Page Builder is a free Plugin for WordPress that helps you to create, edit and customize every aspect of your website in a visual way without any coding skills.
To begin with here are the requirements to use Elementor. Basically all you need is WordPress. Morever the Theme you use with WordPress is not important. That’s because Elementor works for every WordPress Theme. However some Themes are optimized for Page Builders like Elementor. Therefore we can recommend the following Themes that are especially designed to work well with Elementor:
With that said, let’s have a look at what we will cover in this guide.
We assume that you have WordPress already installed. In case you don’t have done this yet, you can follow our guide on how to make a free Website with WordPress.
Step #1: Using Elementor in WordPress
Installing Elementor
There are several ways to install Elementor in WordPress. Therefore in this guide we will cover the most common ones.
Basically Elementor can be installed like any other Plugin for WordPress. This means that you can download Elementor either from your WordPress Dashboard or you can download and upload the Plugin manually to your WordPress Plugins folder. As a bonus to this two most common ways of installing a Plugin in general, the creators of Elementor also offer a step by step process.
Installing Elementor from your WordPress Dashboard
This is the recommended and most common way to install Elementor. Just do the following:
- Login to your WordPress Dashboard
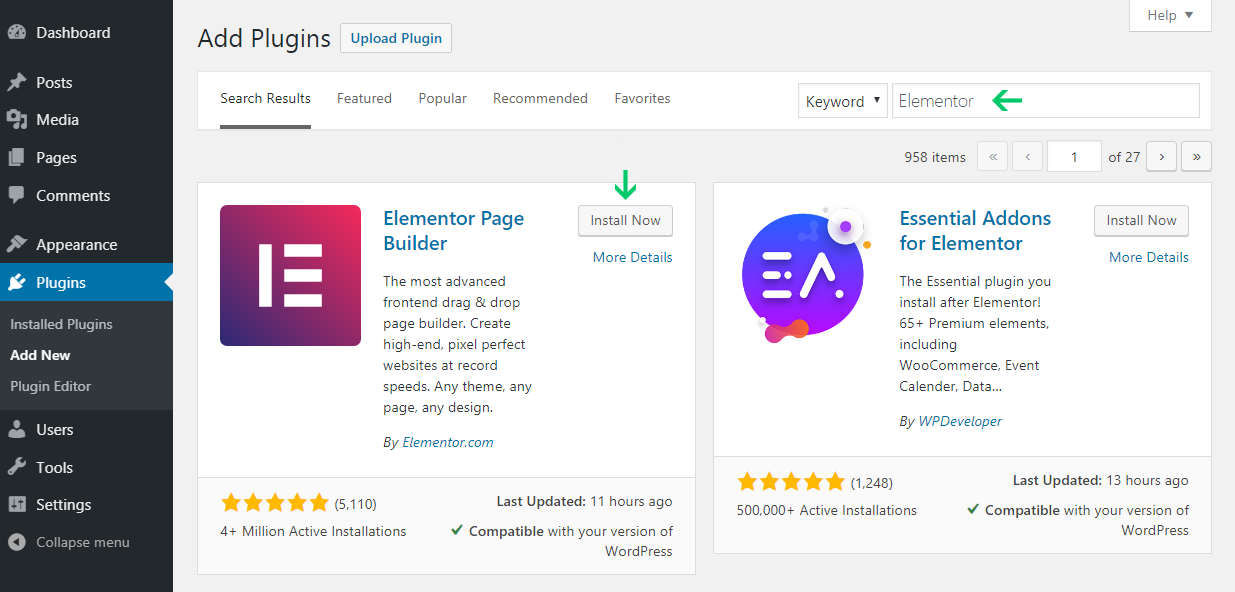
- Within your Dashboard go to Plugins > Add New
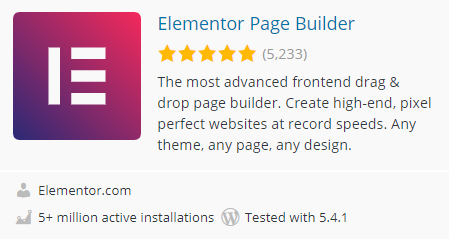
- In the Search field enter Elementor and select the Plugin “Elementor Page Builder”

- Install the Plugin by clicking the “Install” button. Lastly activate the Plugin by clicking the “Activate” button.
Installing Elementor manually
Sometimes a direct install does not work. When this is the case, try the following method:
- Go to https://wordpress.org/plugins/
- In the search field enter Elementor
- Select the Plugin “Elementor Page Builder”
- On this page, click on Download
- Upload the Pluign
- Option 1: Go to Plugins > Add New and click on “Upload Plugin”
- Option 2: Unzip and Upload the downloaded file to your WordPress Plugins folder (wp-content/plugins)
- In your WordPress Dashboard go to Plugins > Installed Plugins
- You should see Elementor Page Builder in the list of available Plugins. Click on the “Activate” button to activate the plugin.
Bonus: Installing Elementor from Elementor.com
The creators of Elementor offer new users the possibility to install Elementor in a step by step process. In order to use this you have to navigate to https://elementor.com and click on the “Get Started” button. Then a guided process is fired up to enable Elementor on your WordPress website.
Enabling Elementor for a Page
In order to use Elementor for a certain Page in WordPress, you need to enable it for that page. You do this within your WordPress Dashboard. Once inside the Dashboard all you have to do is to open up an existing Page or create a new one. When you are in the editor, search for a button called “Edit with Elementor”.
Step 1
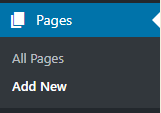
In your Dashboard go to Pages > Add New
Step 2
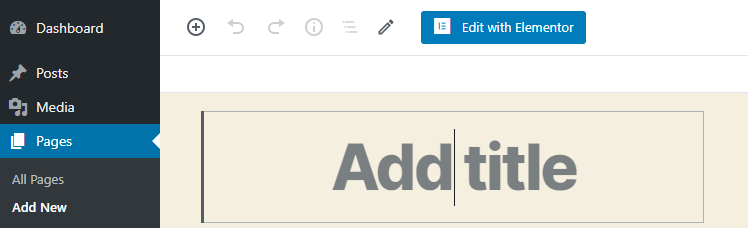
Enable Elementor for your Page by clicking on “Edit with Elementor”
After you clicked on the “Edit with Elementor” button, a blank Canvas with the Elementor editor should appear. Now we can start creating our page with Elementor.
Step #2: The Elementor UI
The Editor
Starting Elementor will lead you to a screen which is divided into two parts. These are the Elementor menu and the live preview. On the left hand there is the Elementor menu. On the right there is a canvas with a live preview of the page you are editing. If you are editing a new page the canvas is empty.
Hint: Depending on the theme that is currently activated in WordPress the Elementor live preview might look different. For example this his how Elementor looks like when the TwentyTwenty Theme is currently active.![]()
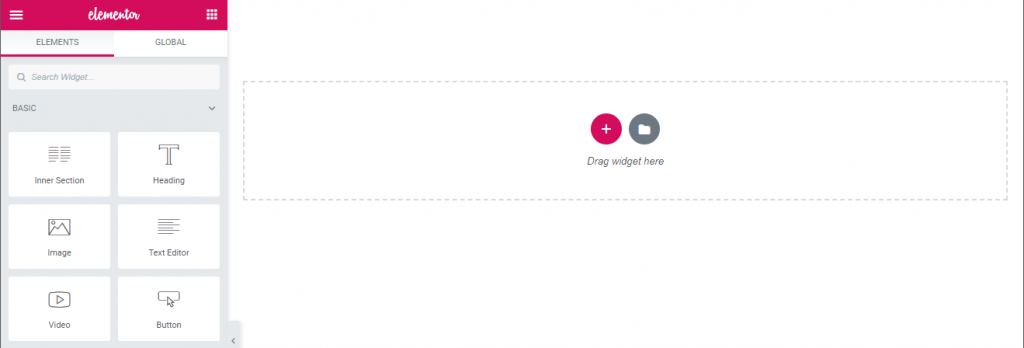
The live preview shows the page you are editing the way it will look for your users. Inside the canvas you can see two buttons. The  button and a
  button (we will explain them later). Elements from the Elementor Menu can be dragged and dropped on the live preview canvas. Moving elements on the canvas also works with drag & drop.
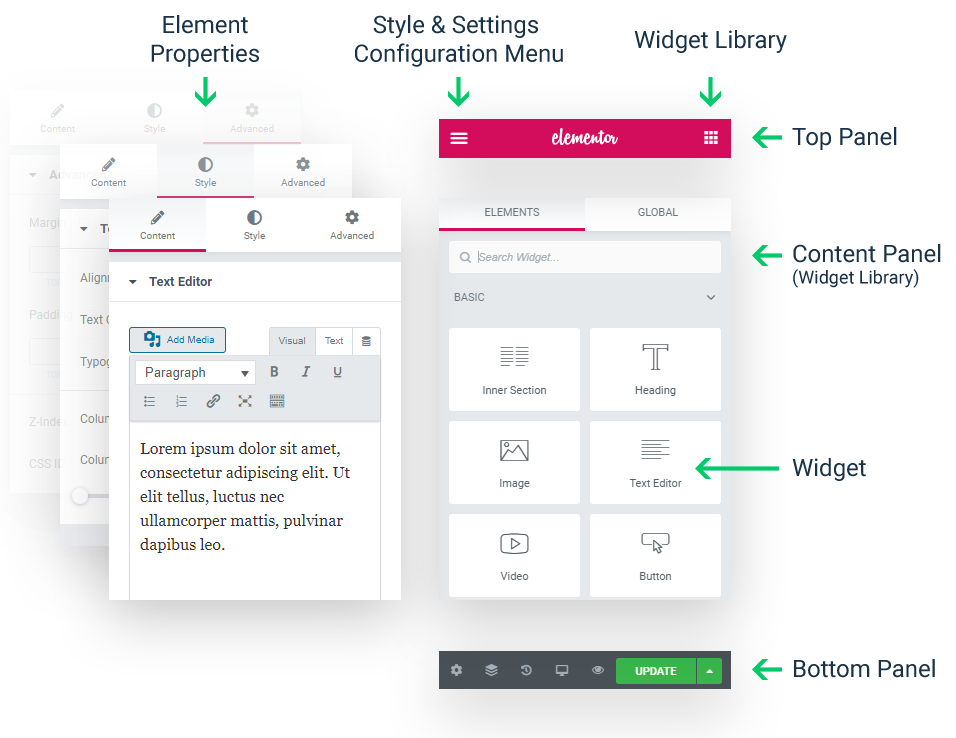
The Elementor Menu itself is divided in three different parts that we call panels.
- Top Panel: The top panel is fixed. This panel contains global functions that are accessible all the time.
- Bottom Panel: Just like the top panel, the bottom panel is fixed and always visible. It contains some more global functions.
- Content Panel: In the middle there is a content panel which changes dynamically. By default a widget library is displayed.
Let’s talk about this Menu in more detail.
Elementor Menu
The following image shows an overview of the Elementor menu with all the relevant features.
Top Panel (left icon) – Style & Settings Configuration Menu
A click on the hamburger icon takes you to a Style & Settings Configuration Menu. This menu is divided into three sections called Style, Settings and More. In this menu you can set Elementor’s Default Colors and Fonts as well as various Editor Preferences like a light or dark Theme. The following options can be set:
Style
- Default Colors: Set the primary, secondary, text and accent colors
- Default Fonts: Set the fonts that are the selected fonts for primary and secondary headlines, body text and accent text
Settings
- Global settings:
- Style tab: Choose the editor’s font fallback, the content width, widgets space, stretched section fit to, and page title selector
- Lightbox tab: If Yes is selected, all image links will open in a lightbox popup window. The other options help you customize the Lightbox to your liking
- Dashboard setting: Leads to the WordPress Dashboard and the Elementor settings
- About Elementor: A link to Elementor.com
More
- Preferences: Set the UI Theme mode (dark or light). You can use Auto Detect to sync the mode with your OS setting. Enable or disable the Editing Handles (these are edititing options when hovering over an element). Enable or disable the Lightbox.
- Finder: Opens the Finder. This finder helps you to quickly find and navigate to certain areas of your site
- View Page: Open the current page in the browser (don’t forget to save your changes before)
- Exit to Dashboard: Exits to the WordPress Dashboard
Top Panel (right icon) – Widget Libray
The Widget Library icon on the right side of the Top Panel brings you back to the default Elementor menu view. Meaning it brings you back to the widget library.
Content Panel
This panel contains flexible elements. This means, the content of the panel changes depending on your selections in the top or bottom panel. Per default you can see a widget library.
Inside the widget library all available Widgets are displayed. Just think of widgets as building blocks of your website. We will explain them in more detail later.
With the search form you can search for the widget you want. Inside the widget library there are also two buttons “Elements” and “Global”. The “Elements” button brings you to the widget library overview. With the “Global” button you can select the widgets you have globally defined (to access and use them on different pages easily). However this is a Elementor Pro feature.
Bottom Panel
The Bottom bar (from left to right) contains the following functions (Hover the icons and you will see their description).
- Settings: Settings of a page, post or template. For example you can set the Title, Featured Image or Status of your page. With the post Layout you can define how the page looks. You can choose between:
- Default
- Elementor Canvas – Without Header, Footer and Sidebar
- Elementor Full Width – 100% Width
- Cover Template
- Full Width
- Navigator: Display a navigation panel to help you select your elements in the page easily.
- History: You can undo and redo the changes you did to your page here.
- Responsive Mode: Elementor distiguishes between three different display types of your page. These are Desktop, Tablet and Mobile. By default you see your page in the Deskop view. Meaning that your page is displayed as users would see it when they visit your page from a Desktop PC. Correspondigly the other two view modes show your page how a visitor would see it from a tablet or a mobile device. Please make sure that your page looks good on all three types.
- Preview changes: Let’s you preview your page. When you click the button a new browser tab will open.
- Publish / Update: Save your changes to the page with this button.
- Save options: You can save your page in different ways. Your page can be saved as a draft in case you do not want to publish your page yet. Save your page as a template when you want to use the exact same design on other pages.
Sections, Columns and Widgets
Basically building a page in Elementor means using three different elements. These are Sections, Columns and Widgets.
Sections
Sections are the outermost and largets building blocks. Also normally a page consists of several sections that are aligned under each other. So sections divide your website vertically. Inside a section are groups of columns.
Columns
Columns reside inside sections. Furthermore a section can hold one ore more columns. While sections divide a page vertically, columns help you to divide a page horizontally. Columns hold the single elements of your page, which are called widgets.
Widgets
They are placed inside columns and can be stacked (so more than one widget can be part of one column). Widgets hold the elements of your page e.g. text, images, buttons or headings.
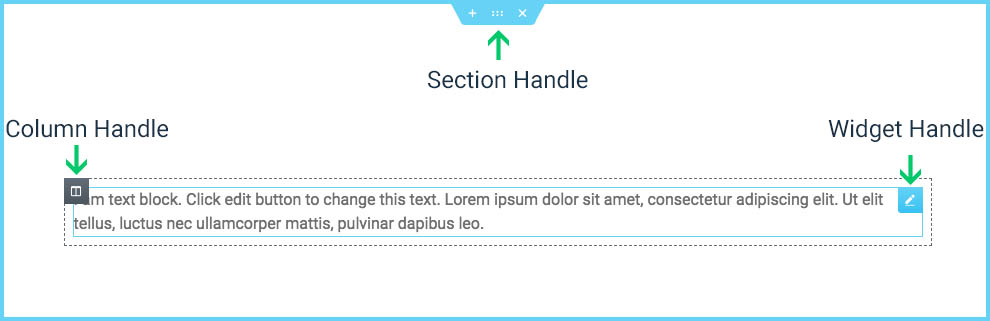
Sections, Columns and Widgets all have so called handles. With the help of these handles you can control them. That is to say you can move them, edit their properties or even duplicate already existing Sections, Columns or Widgets. The duplicate function is especially useful when you have created a complex layout and want to use it in different spots within your site.
In the following chapters we will get into all necessary details for Sections, Columns and Widgets. That is to say we will explain how you create them and their properties.
Sections and Columns
Creating Sections
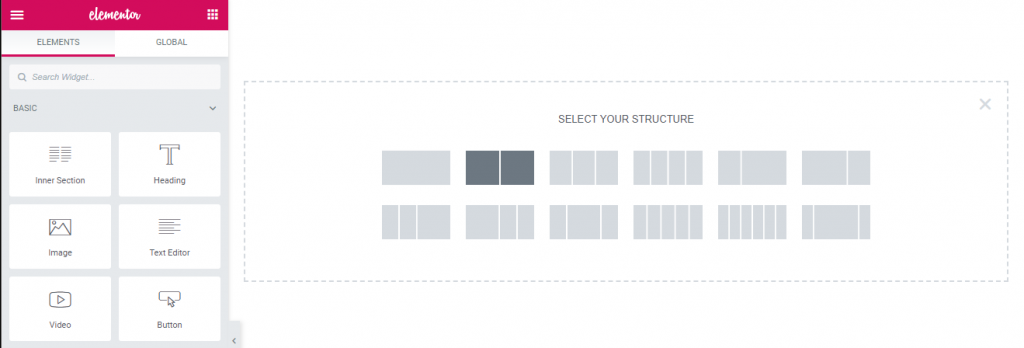
- In the live preview of Elementor search for the icon.
- A submenu should appear which asks you to select the structure for your section by selecting a column structure. (Hint: You can edit the column structure (e.g. add, remove, resize columns) anytime)
- After you have created your section you can edit, duplicate, copy, delete etc. your section with a right click.
Use the Section handle  to: add a section, drag a section, or delete it.
Creating and editing Columns
Once you have created your section which contains your columns you can do the following:
- Set the Column Width: You have two options to set the width. The first option is to edit the column width from the layout options for this column (in the Elementor Menu). Therefore you have to click the column handle (or right click the column and use “Edit Column” in the appearing menu). The second option is to dynamically drag the dashed line between two columns from left to right.
- Add Columns: To add a new column, right click into an existing column. Then a menu should appear which gives you the option to “Add New Column”. Alternativley you can also duplicate the existing column. This gives you an exact duplicate of the column, also including the containing widgets.
- Delete Columns: Right click on the column you want to delete. Afterwards a menu appears. Then click on “Delete”.
Widgets
The free version of Elementor already comes with a lot of handy widgets. These widgets are grouped into three main categories: Basic Widgets, General Widgets and WordPress Widgets. In the following we will describe all the widgets that contain to these groups.
Hint: Elementor Pro comes with tons of more widgets that can be really helpful for your page.
Basic Widgets
| Columns | Create inner columns within the column. |
| Heading | Add eye-catching headlines. |
| Image | Control the size, opacity and other settings of images. |
| Text Editor | A WYSIWYG text editor, just like the WordPress editor. |
| Video | Add YouTube or Vimeo to your page. |
| Button | Controlling every aspect of the button design. |
| Divider | A line that divides different elements in the page. |
| Spacer | A space that divides the various elements. |
| Google Maps | Embed maps into the page. |
| Icon | Place one or more of 600+ icons available. |
General Widgets
| Image Box | A box that includes image, headline and text. |
| Icon Box | Works the same as the image box, only with icons. |
| Image Gallery | Displays your images in an aligned grid. |
| Image Carousel | A rotating carousel or slider of chosen images. |
| Icon List | A bullet list with any chosen icon and text. |
| Counter | Show stats and numbers in an escalating manner. |
| Progress Bar | Include an escalating progress bar. |
| Testimonials | Customer testimonials that show social proof. |
| Tabs | Vertical or horizontal tabs that display different pieces of content. |
| Accordion | A collapsible display of content. |
| Toggle | Like Accordion, for FAQ pages. |
| Social Icons | Icons to your social pages like Facebook / Twitter. |
| Alert | A colored alert box to draw the attention of the visitor. |
| Audio | Add audio bits from SoundCloud. |
| Shortcode | Easily insert shortcodes from any plugin into the page. |
| HTML | Insert code into the page. |
| Menu Anchor | Link any menu to this anchor. |
| Sidebar | Add any sidebar into the page. |
WordPress Widgets
There is only one widget in this group. This widget will give you access to all already existing WordPress widgets, e.g. Pages, Calendar, Archives or Audio.
Creating Widgets
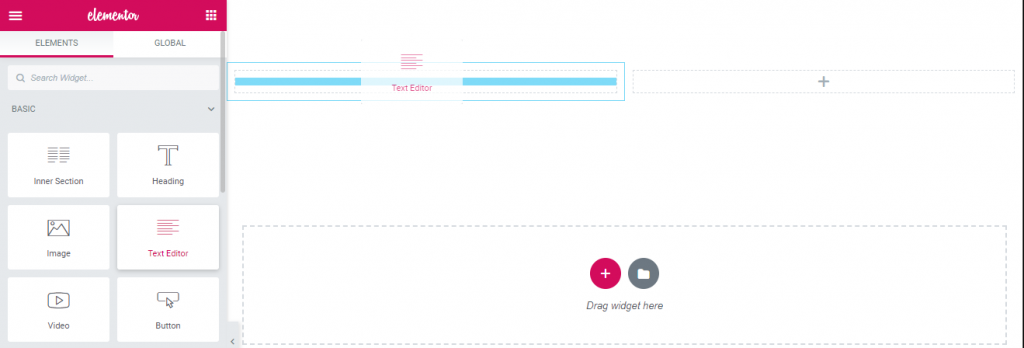
You drag and drop widgets inside Columns. To do so, select a widget from the Elementor menu, hold it and drag it into the column of your choice.
Hint: The width of a widget is defined by the width of the parent column.
Properties of Sections, Columns and Widgets
Sections, Columns and Widgets have properties. These properties can be edited to fit your needs (e. g. the style of your site). Furthermore Sections and Columns each have the same properties. These are Layout, Style and Advanced properties. On the other hand Widgets have the properties Content, Style and Advanced.
- Layout Properties: With this property you can take control over the size of a section or column and control the position of children elements.
- Style Properties: This property let’s you define the styling of your element. For example you can set the background (e. g. color, image, gradient or video), border, shadow or the typography.
- Advanced Properties: Here you can set advanced options for your element. In more detail these options range from setting the padding, border and margin of an element to the possibility to hide an element for certain views like a tablet or mobile view.
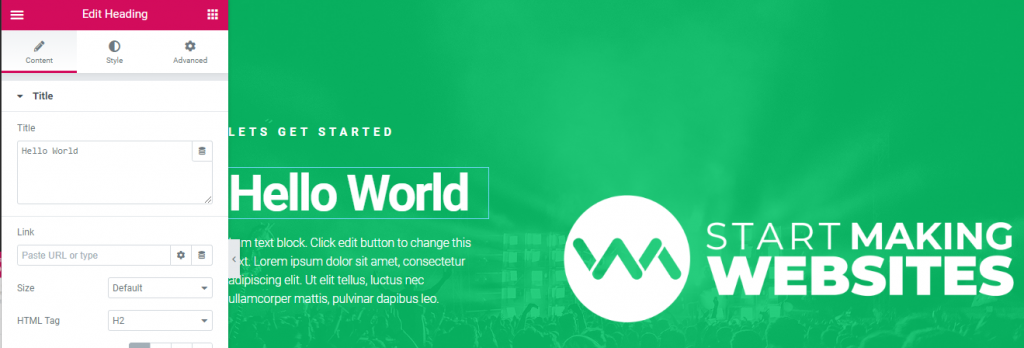
- Content Properties: The content properties are very much dependant on the Widget you are editing. This means that for example you can define the text of the Text Widget here or the image for the Image Widget.
Step #3: Building a Page with Elementor
Now you know everything that is necessary to properly use Elementor. Consequently it’s time to get started and build a page with Elementor. Therefore the following steps are involved:
- Create a section
- Define the number of columns for that section
- Drag & Drop the Widgets into the columns of your choice
- Customize the Widgets to your liking
- Save the page
In the following we will show you how all of this is done.
Step 1 – Create a Section
In the live preview of Elementor press the icon to create a new section.
Step 2 – Set Columns
After clicking the button you have to select the number of columns for that section.
Step 3 – Create Widgets
Drag & Drop the widgets you want into the newly created columns.
Step 4 – Customize Widgets
Use the properties of your widgets to customize the Widgets to your liking.
Step 5 – Save
Finally click on the button “Save” or “Update” in order to save your page. Optionally you could also save the page as template. Therefore click the Save Options button (up arrow icon) and select “Save as Template”.
Step #4: Inserting a Template
You are not the best designer in this world? Customizing Widgets is too complicated or too time consuming? Then Elementor has a solution for you and it’s called the Template Library. With this library you have access to hundreds of ready-to-use and designer-made Page layouts and blocks. Using this library helps you create stunning looking websites in no time.
Hint: You need to sign up to Elementor in order to use the Template Library. The sign up is for free.
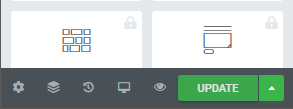
Click the “Add Template From Library” icon . Afterwards you are able to add a Page template, Block, or your own Saved template.
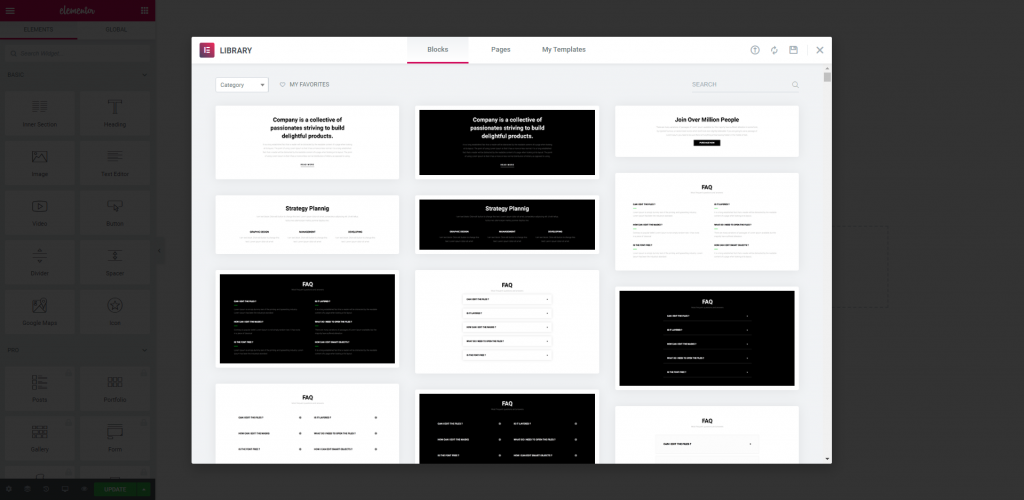
Within the library select the element you want. After that, click on the Insert button to insert the template to your page. Subsequently the element will be added to your page. Afterwards you can customize the Template to your liking (e. g. adjust the colors and fonts to fit your stlye).
Pro-Tip: Templates (e.g. the ones you found on a marketplace) can also be uploaded to the template library. Therefore open the template Library and click on the ![]() icon. This function gives you the option to upload a Template to your library.
icon. This function gives you the option to upload a Template to your library.
Elementor Pro vs. Elementor Free
Basically Elementor Pro is an extension of the free version which adds tons of more features to the Page Builder. For example the Elementor Pro version adds over 30 additional Widgets, a tool to build Header and Footers, PopUps, dynamic Posts, Forms or an integration for the very popular WooCommerce plugin. Besides that the Pro Version gives you access to many more Templates from the Template library.
All in all Elementor Pro will give you a lot of more desirable features that help you speed up your workflow and give you the possibility of even more control over the appearance and functionality of your page or website in general. So lets quickly compare both versions.
| Elementor Free | Elementor Pro | |
| Price | Free | Starts at $49/year |
| Number of Widgets | 25+ | 50+ |
| Page builder | ✓ | ✓ |
| Marketing (e.g. Popup Builder, Sticky Elements, Social Buttons, Call To Action) | X | ✓ |
| Theme Builder (e.g. Theme Elements, Display Conditions, Header and Footer) | X | ✓ |
| Included 24/7 support | X | ✓ |
| Dynamic Content (e.g. Request Parameters, Widgets) | X | ✓ |
| Pro Templates and Blocks | X | ✓ |
| E-Commerce (e.g. Price Table Widget, Produvct Archive Template) | X | ✓ |
| Forms (e.g. Contact Forms, Subscription Forms, Login Form) | X | ✓ |
| Integrations (e.g. MailChimp, ActiveCampaign, ConvertKit, Campaign Monitor, HubSpot, Zapier) | X | ✓ |
As you can see, the Pro Version of Elementor comes with a lot of useful features that might come in handy. If you want to get even more insights, then check out the full comparison table here https://elementor.com/pro-vs-free/
Further Reading
Official Documentation for the first steps with Elementor: https://docs.elementor.com/category/5-first-steps
Conclusion
We hope you found this guide a good starting point to make your own websites with Elementor. Just always remember, practice makes perfect. So we suggest you take your time to play around with Elementor and come back to this guide if things are unclear to you.