Preface
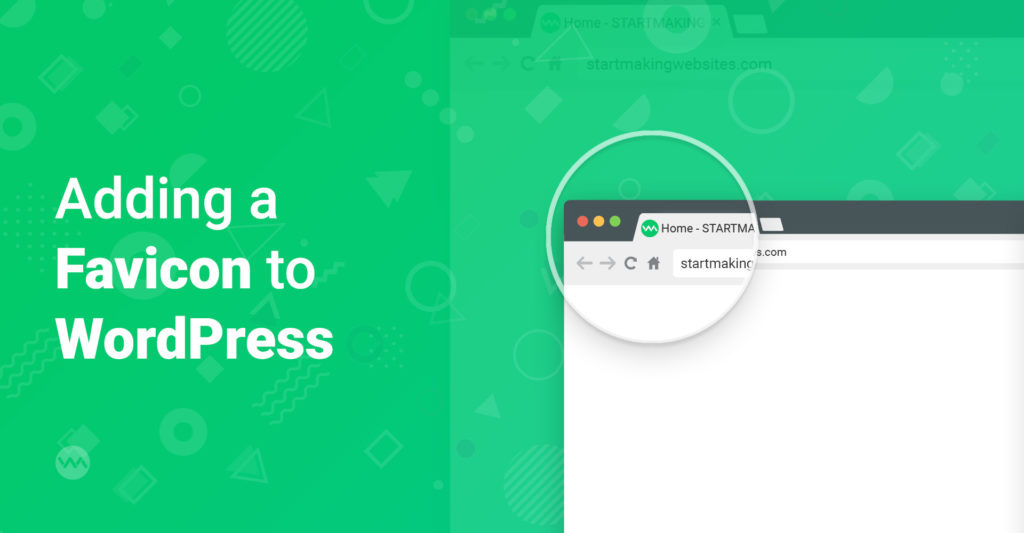
In this Quick Tip we want to show you how to add a favicon to your WordPress website in two different easy ways. But first let’s make things clear…what is a favicon in the first place?
The favicon (favorite icon) of your website is that small little image that represents your website e.g. in the favorite menu, in tabs, as icon on your home screen and many other spaces.
WordPress websites per default show the WordPress Logo as favicon. When you want to make your site look more professional you should really think of changing it into something that represents YOUR site better. There are many reasons for that. Some are the following:
- It gives your site a professional look
- It’s good for brand recognition
- You stand out of the crowd (Just think of 10 open tabs in your browser. A good favicon stands out)
Now that we know what a favicon is and why it is important, it’s time to get started. In the following we will show you how to first create a favicon. Afterwards we will show you two easy ways on how to get your favicon into your WordPress website.
How to Create a Favicon for your WordPress Website
There are two main things to consider when creating a favicon. These are the file format and the size/dimension of your favicon.
For years the standard format for a favicon was ICO. This format has several advantages. First of all it has an universal support in all browsers (also mobile devices). Furthermore it can store more than one version of an image and it supports transparency. However nowadays you are also good to go using file formats like PNG, GIF (also animated), JPG or SVG. Modern browsers support these file formats, too. So basically you are free to choose the format.
For the size/dimension of your favicon you basically only have to remember the following. Make sure that your favicon is square and big enough. For example WordPress recommends 512px x 512px or bigger.
Now the question arises which tools you should use to create a favicon. There are some online services that help you create a favicon out of an existing image like https://www.favicon-generator.org/ or https://favicon.io/. Of course you can also create your favicon with software like Photoshop or GIMP (free).
Pro-Tip: Eventually you might ask yourself how a favicon should look like or what it should contain. A lot of brands use their logo or a “short form” of their logo. Another option would be to use the first letter of your brand name. When talking about colors…use your already existing brand colors.
How to easily insert your Favicon into your WordPress Website
Now let’s insert our newly created favicon. We want to show you two different ways. The first approach uses the WordPress Customizer. If that does not work or you want to have more control, then use the second approach. With the second approach we show you how to manually insert your favicon into your WordPress website with the help of the functions.php.
Using the Customizer
The easiest and probably the most common way to add a favicon to your WordPress website is to simply use the WordPress Customizer. Since WordPress 4.3. the Customizer has an option to add a favicon.
In order to access the Customizer and add a favicon, do the following:
Step 1 – Upload your Favicon
- Login into your WordPress Dashboard
- Inside your Dashboard search for Appearance > Customize.
- Then search for the option that is called Site Identity
- Inside the Site Identity you should see an Option that says Site Icon.
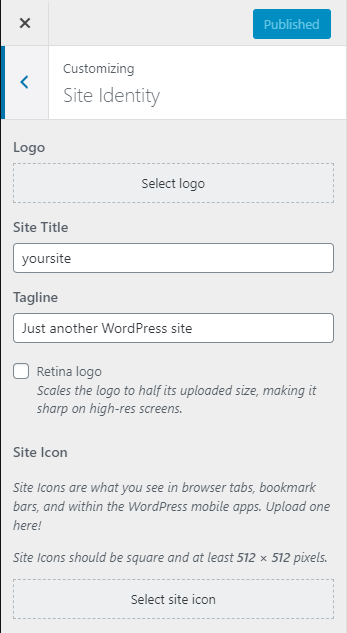
- Click on “Select site icon”
Step 2 – Adjust and Confirm
- Now you have to upload your favicon or use an image that’s is already uploaded to your Media Library.

- If the image is too big you are able to crop it.
- When you have done everything correctly, you should now see your favicon.
Hint: The location and the labeling for inserting the favicon might be different in your theme. This heavily depends on the theme you are using.
That’s it. Your are done 🙂
Manually inserting the Favicon into Functions.php
Inserting the favicon manually is fairly simple as well. It just needs a little bit of coding and the correct path to your favicon. Nothing fancy!
So first of all we have to upload our favicon. There are several ways to do this. One way would be to upload the favicon to your Media Library. Another way would be to manually upload the favicon to your theme folder. We will show you both options.
Uploading the favicon to your Media Library
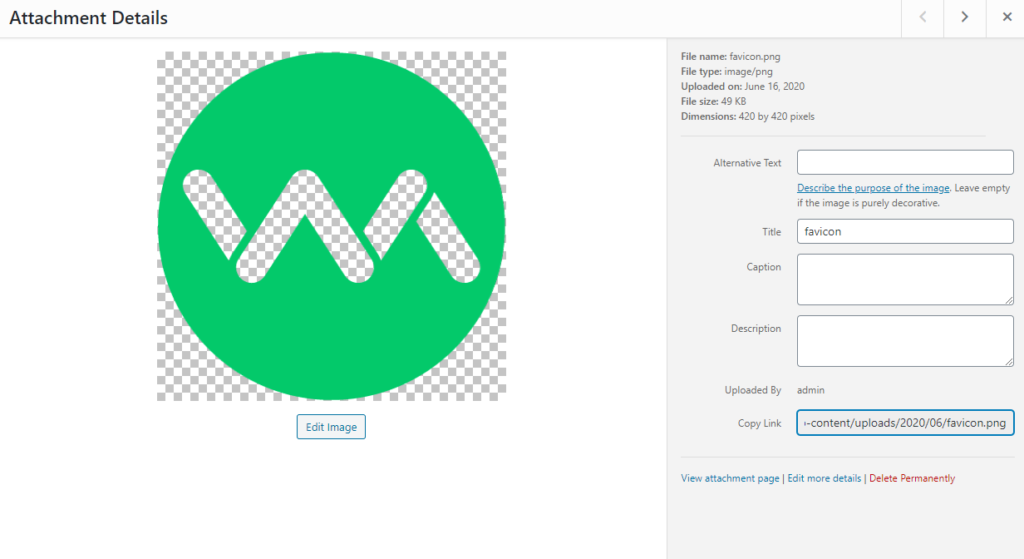
First go to your WordPress Dashboard. Then go to Media > Add New. Upload your favicon. Now comes the important part. We need to remember the path where the favicon was uploaded to.
Hint: Usually WordPress uploads files into a folder that is called uploads. Inside the uploads folder there can be several subfolders. For example a subfolder for the year and another one for the month, the file was uploaded (this depends on your theme settings).
See the part in the image below where it says /2020/06/favicon.png … this is what we need to remember.
Now you can add the following code to the bottom of your functions.php. The functions.php should be located in the root folder of your Theme.
Hint: Want to learn more about the functions.php and what it is? Then go check out our article about the functions.php of WordPress.
function add_favicon() {
	$uploads = wp_upload_dir();
	echo '<link rel="shortcut icon" type="image/png" href="'.$uploads['baseurl']. '/2020/06/favicon.png" />';
}
add_action('wp_head', 'add_favicon');
This code first of all gets the url to the uploads folder of your WordPress website. Next we create a <link> which holds your favicon. To do so we need to provide the correct path to the favicon. See the /2020/06/favicon.png in the code? That’s the path we remembered from uploading the favicon to the Media Library. Adjust the path to make this code work with your website.
Hint: In case you are using a favicon.ico instead of a favicon.png do the following: Change type="image/png" to type="image/x-icon".
Uploading the favicon manually
Another option is to manually upload your favicon to your Theme. In our example we have uploaded the favicon to a folder called assets.
function add_favicon() {
	echo '<link rel="shortcut icon" type="image/png" href="'.get_template_directory_uri().'/assets/favicon.png" />;
}
add_action('wp_head', 'add_favicon');
This code basically does the same as the first code example. The only change is the path to our favicon. Instead of searching in the uploads folder for the favicon, we need to provide the path to our assets folder inside our theme. To do so we provide the url to our theme (get_template_directory_uri()). Then we add the rest of the path.
Hint: In case you are using a child theme and your favicon is located in the child theme you have to use get_stylesheet_directory_uri()instead of get_template_directory_uri(). And if your are using a favicon.ico instead of a favicon.png do the following: Change type="image/png" to type="image/x-icon".
Conclusion
In this Qick Tip we have showed you two different ways to easily add a favicon to your WordPress Site. Of course there are some more ways to add a favicon. For example you could also use a WordPress Plugin for that. Some examples are Favicon by RealFaviconGenerator or All In One Favicon. There are even Plugins that let you shuffle between different Favicons like Favicon Rotator. You see the options are endless. Now we wish you a lot of fun experimenting with your Favicon 🙂 We wish you a great day 🙂


1 thought on “2 Easy Ways on how to add a Favicon to Your WordPress Website”